Oracle Analytics Cloud modeler can create a custom Time dimension, without needing a physical table. Our sample analysis and dashboards will make use of a hierarchical display, based on this time dimension.
Click on “Lock and Edit” to launch the modeler tool again (Screen 26).

Screen 26
Click on the “Add” button in Dimension Tables and choose “Create Time Dimension” (Screen 27).
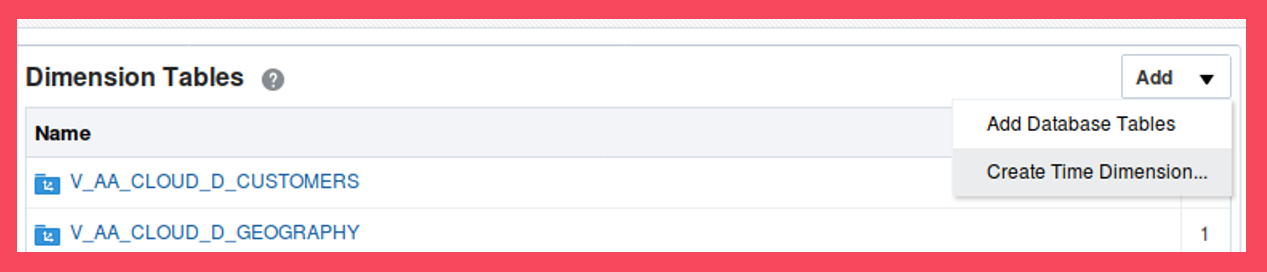
Screen 27
Choose “Year” and “Month” levels for the time dimension. Click “Next” and then “Create”. The time dimension table in the database will automatically be created and loaded (Screen 28).
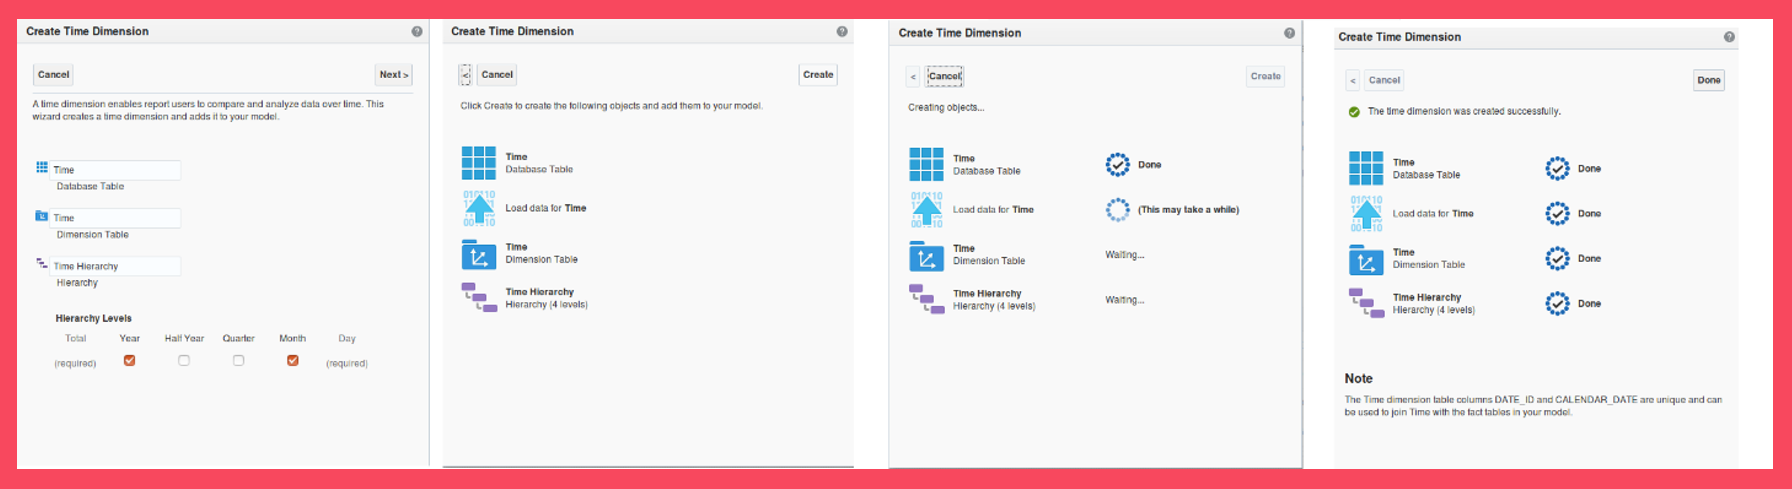
Screen 28
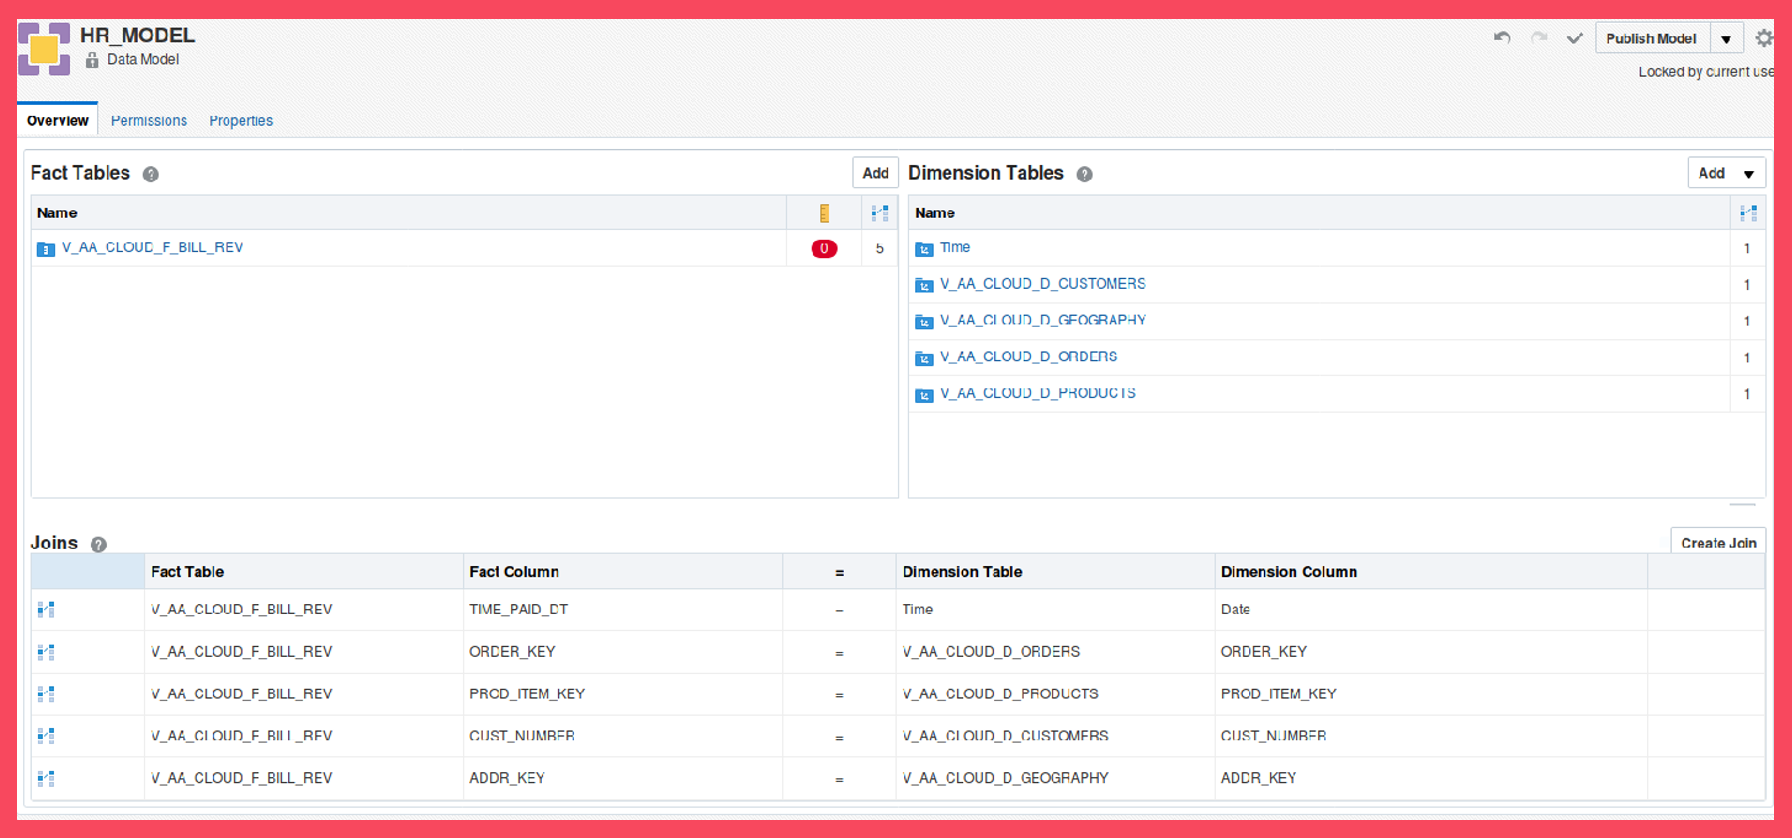
Now we need to join this time dimension with our fact table. Create the join between Time dimension and the Paid date (Time_paid_dt) column.
The model now has one fact table, five dimension tables, and five joins, as shown below (Screen 29).
Step 7: Creating an Analysis in Oracle Analytics Cloud
Now that we have created a Time Dimension, we are ready for the next step: creating an Analysis. Click “Next step” to go to Step 7: Creating an Analysis in Oracle Analytics Cloud.

