NetCICD is a network automation framework developed from the start as a structured pipeline. It takes an industrial approach for network deployments, given the bulk nature of network changes.
In a series of blogs I take you through the steps required to get a NetCICD pipeline up and running using the NetCICD github repo and local instances of Gitlab, Jenkins, Ansible/AWX and VIRL on VMware Workstation.
In the second episode we prepared VIRL/CML.
Let’s get the NetCICD network automation pipeline up and running
This is the third in the series of blogs dedicated to get the NetCICD network automation pipeline up and running. In this episode we will prepare git. I use Gitlab, as it is a fully functional, open source git server and it provides all features I use in the pipeline.
I installed Gitlab in a VM, but you may also use any of the official methods.
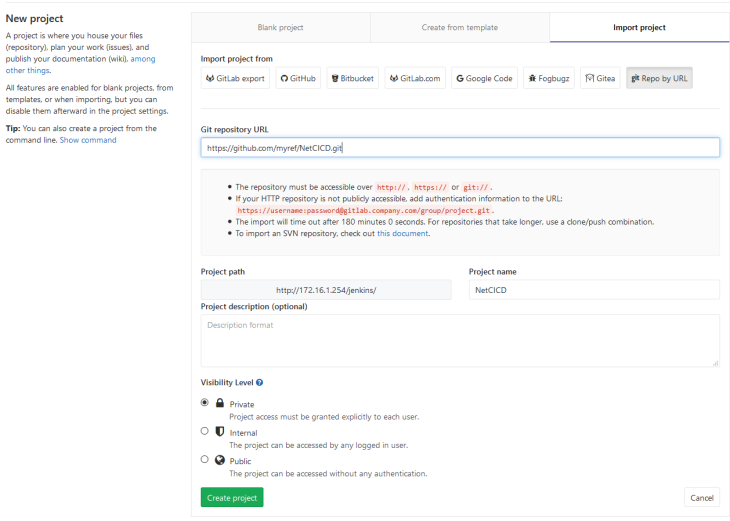
When you have finished installing, you can create a new project for NetCICD. Use “Import project” and select “git Repo by URL“. Use https://github.com/devoteam/NetCICD.git as the Git repository URL.
I use a private repository, to be able to control who to accesses the repo. Remember, in most companies network configurations are classified as a corporate secret.

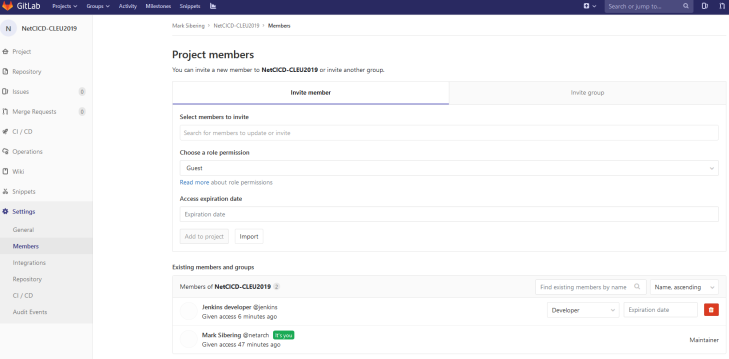
Next you need to add members to your project. These are people that can either read or contribute to the code.
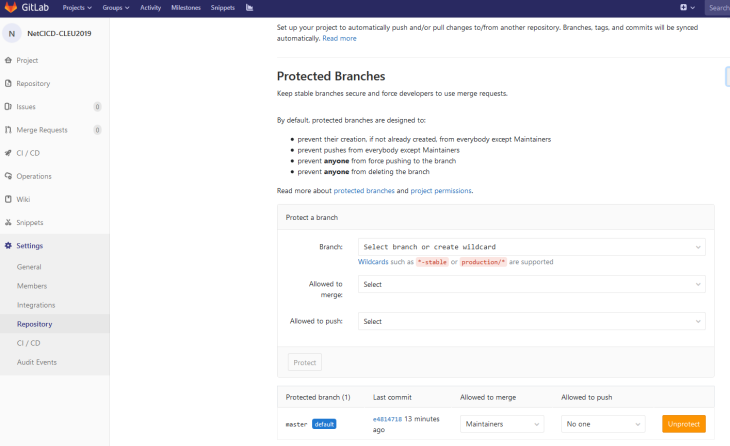
In the latest Gitlab release, no-one can commit to the master branch. This is a good thing, changes must be made in a topic branch and entered into the master using a merge request. The master branch is “protected”:
 This prevents single users from pushing changes into your production repository without other people approving that change or knowing about it.
This also implies that you need at least 2 users in the system: a maintainer and a developer:

That’s it. We’ll configure Jenkins to track the repository and all branches and build automatically.