NetCICD is a network automation framework developed from the start as a structured pipeline. It takes an industrial approach for network deployments, given the bulk nature of network changes.
In a series of blogs I take you through the steps required to get a NetCICD pipeline up and running using the NetCICD github repo and local instances of Gitlab, Jenkins, Ansible/AWX and VIRL on VMware Workstation.
This is the second in the series of blogs dedicated to get the NetCICD network automation pipeline up and running. In this episode we will prepare the simulation environment, VIRL in this case.
I assume a stock install of VIRL 1.5.145, and that reachablility for FLAT is working. I do not need Internet access from within the simulations, but Internet access from UWM might come in handy to download images from Dockerhub.
Patching VIRL
While developing NetCICD, I ran into some bugs that are quite annoying as they ruin simulations. The fix is pretty easy: ssh to your VIRL/CML machine and execute:
sudo crudini --set /etc/libvirt/libvirtd.conf DEFAULT keepalive_count 15
sudo sed -i '/^[[]DEFAULT[]]$/d' /etc/libvirt/libvirtd.conf
sudo service libvirt-bin restart
This fixes that some devices in large simulations will not start due to a timeout. For more info on this, see the VIRL forum.
In addition, I ran into a “slicing issue” when starting multiple containers. This can be fixed as follows:
sudo crudini –set /etc/virl/virl-core.ini orchestration node_op_batch_size 7
sudo systemctl restart virl-std
The restart should take about 20 seconds.
Memory management
The simulations running in NetCICD are quite large and require significant memory and CPU resources. My system has 64 GB of memory and 4 cores. In order to be able to run the simulations, I needed to tweak VIRL settings to be able to run the simulations.
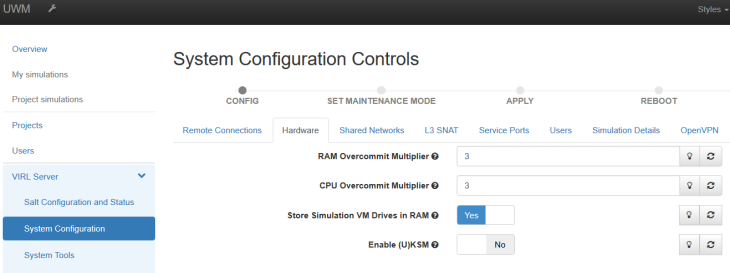
In UWM, go to VIRL Server -> System Configuration -> Hardware. There you can set the RAM overcommit to a higher value (3 in my case) and in case you have 32 GB or more of RAM, store the VM drives into a RAM drive to start faster.
Docker containers
In NetCICD simulations run isolated. Isolation is essential for reliable testing, but also when you start running all kinds of security and penetration tests inside the simulation. In order to be able to control anything inside, I have a dedicated jumphost inside the simulation.
There is also a Linux jumphost present in a simulation. But I cannot install all packages I need on the mgmt-lxc, next to the fact that that would take too long to install everything in each simulation run. And the mgmt-lxc is used within VIRL for other activities as well, such as reachability checks. This might influence my simulation run, so I resorted to building a Docker container containing all required items. Docker containers based on Alpine are very small, boot fast and can provide all that is needed.
I use those containers for several purposes: as a syslog server, a snmp server, a tacacs server, traffic generation, and Netconf XML conversion.
Activating containers in VIRL is a two-step process: first you create a subtype, then you load the container image.
Subtypes
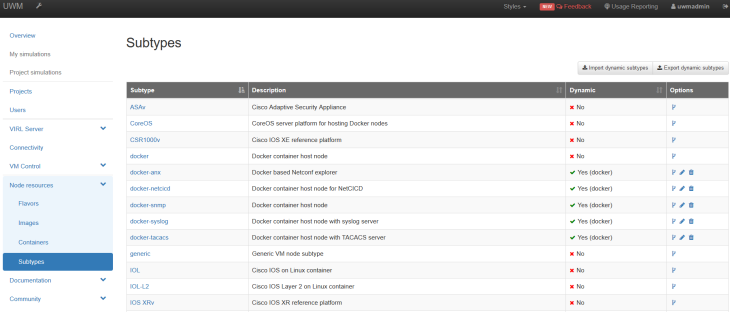
The first step is to spawn subtypes from “docker” by clicking on the little fork on the right side of the docker subtype (options column). You can find this under Node resources -> subtypes as shown below.
You want to create at least docker-netcicd, docker-anx and docker-syslog as these are required to boot the stage lab for stage0. The snmp and TACACS containers may be added later.
Cisco published this video on how to create subtypes.
For the required container types these are the settings:

The rest can be left untouched.
Creating the container images
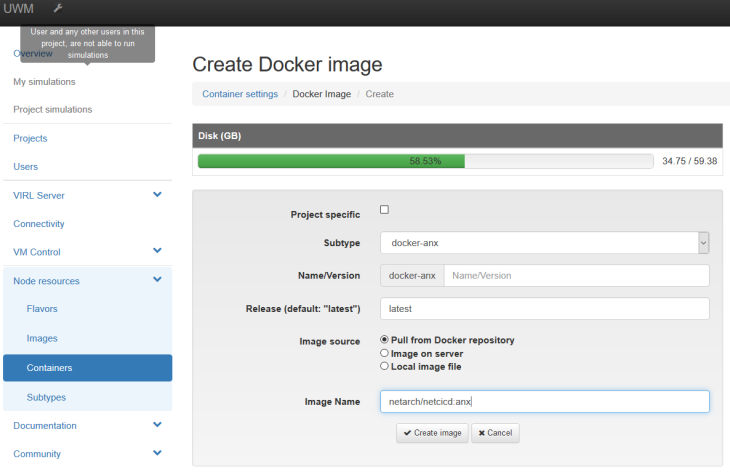
To get running quickly you can use the images on Dockerhub. In order to do so, go to node resources -> containers, go all the way to the bottom to see the Docker containers and click add. Now add the containers, one by one. For the NetCICD container:

For the Advanced Netconf Explorer:
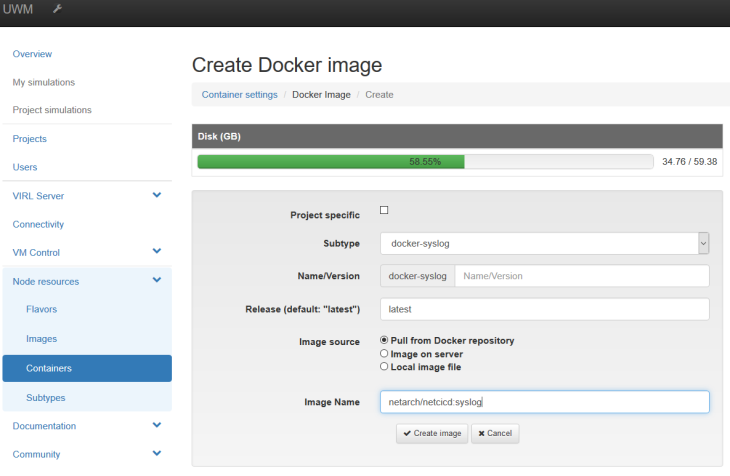
and finally the syslog container:
Adding users (CML only)
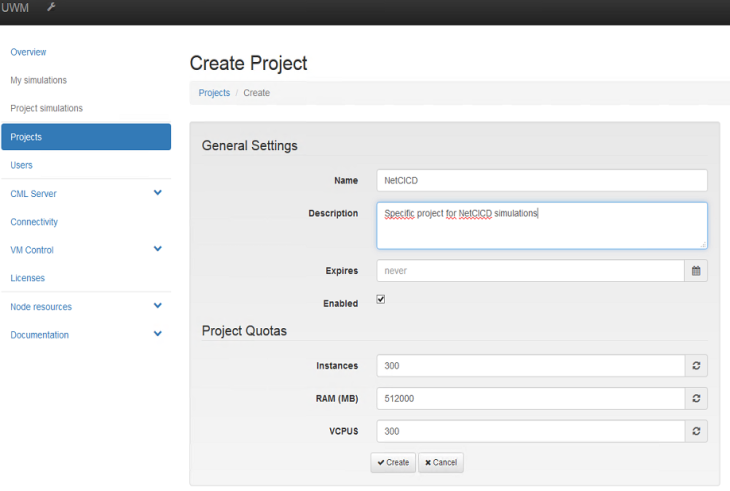
It is good practice to have NetCICD run under its own user. As VIRL is the single-user version and CML the multi-user version, this is only possible in CML. This way the simulations of NetCICD cannot influence any other simulation that is running. You have to create a project first:
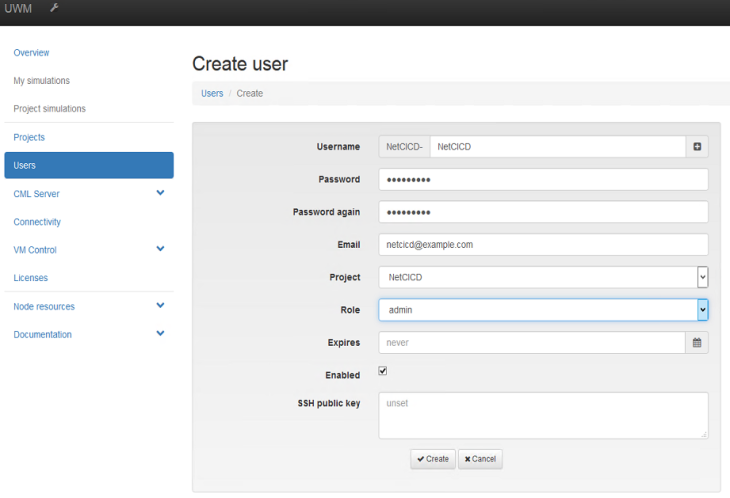
and then the user can be added to the project:
Preparing VMMaestro
If you use CML, you want to add the user to VMMaestro as well, or you do not see the simulations. In case you are using VIRL, you need to use the guest account for both your own work as well as the simulations. This username and password need to be entered in Jenkins as the CML-SIM-CRED.
Updating subtypes
As you added subtypes in the first step, these need to be known in VMMaestro. Go to File -> Preferences -> Node subtypes and scroll all the way to the bottom. Click “Fetch from server” and OK. You should see the subtypes in your nodes section now.
Using VMMaestro with git
It is handy to be able to create or modify simulation environments directly from VMMaestro. This way you can validate that the topologies work in your environment before kicking off the whole pipeline and finding that it failed because of some flaw in booting your LAB.
It is essential that you use your own git server, and not the repository on Github, as you cannot push or commit to that repository.
The correct way to do this is to clone the github repository to your own git server and work from there. So, from your local git server, you check out to your local machine.
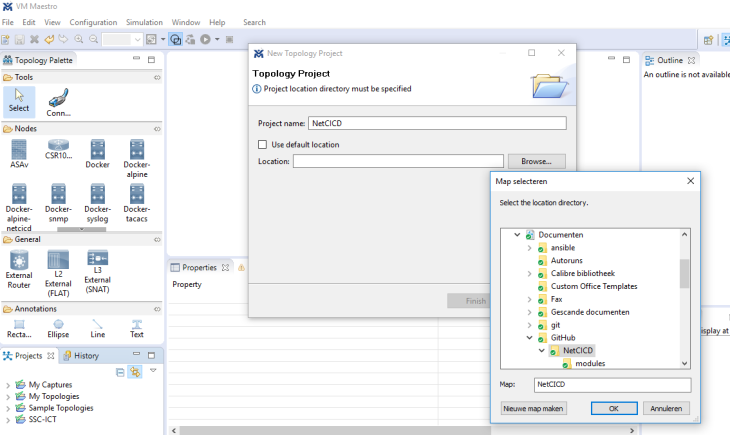
In VMMaestro, you create a new topology folder under File -> New -> New topology Folder. You can then add the folder where you checked out NetCICD. When done, it autmatically adds the git data and you can commit directly from VMMaestro.
Your first test
If you followed the steps above, you should be able to see the NetCICD directory and the VIRL folder. Inside the VIRL folder are the sample topologies. At least stage 0 should run in VMMaestro now (depending on the resources of your machine). Stage 2 and higher require more than 8 cores to run properly.

