
In this (second) installment, we will dive into the API Management development capabilities using the Axway Policy Studio; use of filters, reading messages with attributes, handling fault and errors. In the first installment of this Axway API Management focused series, we have covered the Axway’s API gateway architecture, its key components and their function. We recommend to read the previous blog.
Installing the Axway API Management Suite
- The Axway API Gateway installer enables you to install the following API Gateway components:
- API Gateway Server
- QuickStart Tutorial
- API Manager
- API Gateway Analytics
- Policy Studio
- Configuration Studio
- API Tester
These Installers are available for – Linux (32 bit, 64 bit), Sun (32 bit), Windows (32 bit). The Note License is required for unrestricted functionality.
Make sure that the installations are successfully completed. Besides that, also the API Gateway Server, Admin Manager, Policy Studio, Configuration Studio have to be successfully installed to enable the API development.
Axway API Management Policy Studio
The Policy Studio project is a design-time store of API Gateway configuration on a local file system, which can be deployed to run anAPI Gateway instance on a server. Policy Studio projects enable you to use API Gateway as a design-time repository for policies as well as a runtime engine for executing those policies.
For example, policy developers can create specific API Gateway configuration projects on their file system, edit the API Gateway policies and other configuration items, and save their changes back to the file system. They can also deploy their local Policy Studio project configuration to a running API Gateway instance to test those changes.
As stated in our previous blog, policy studio is an eclipse based graphical user interface. It enables API developers to virtualize APIs and develop policies.
Few striking features of policy studio:
- Flow chart based development flow;
- Easy to read and understand policy flow;
- Extensive set of out of the box filters;
- Graphical drag and drop interface enables to configure filters.

An API project is typically consist of set of APIs, their policies and group configurations can be edited separately from the rest of the configuration.
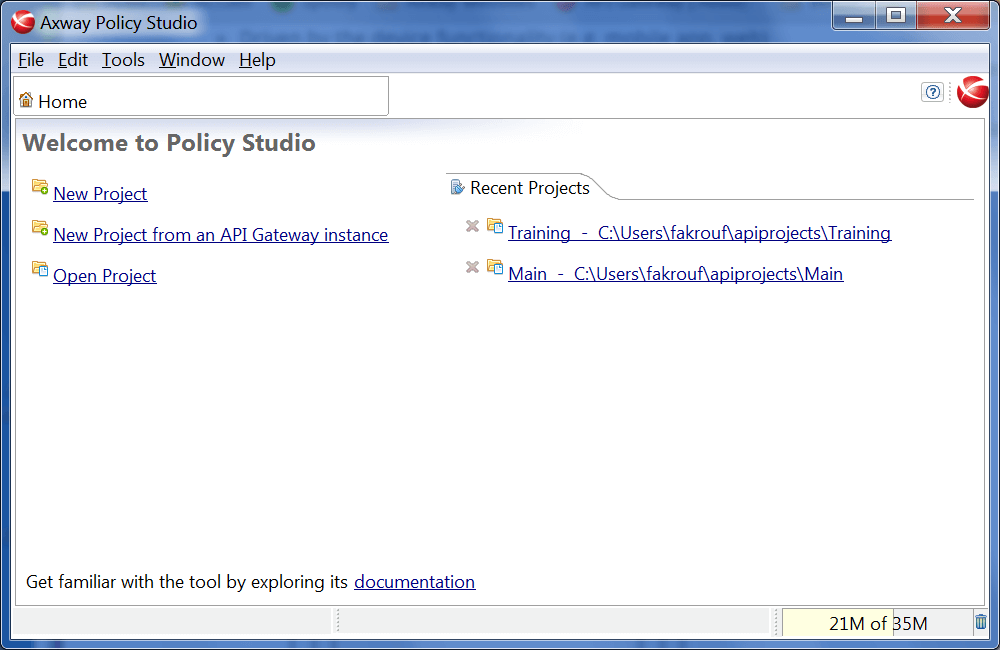
Policy studio shows the following options to create a project:
- New project (empty);
- From an API gateway instance.
You can also open an existing project:
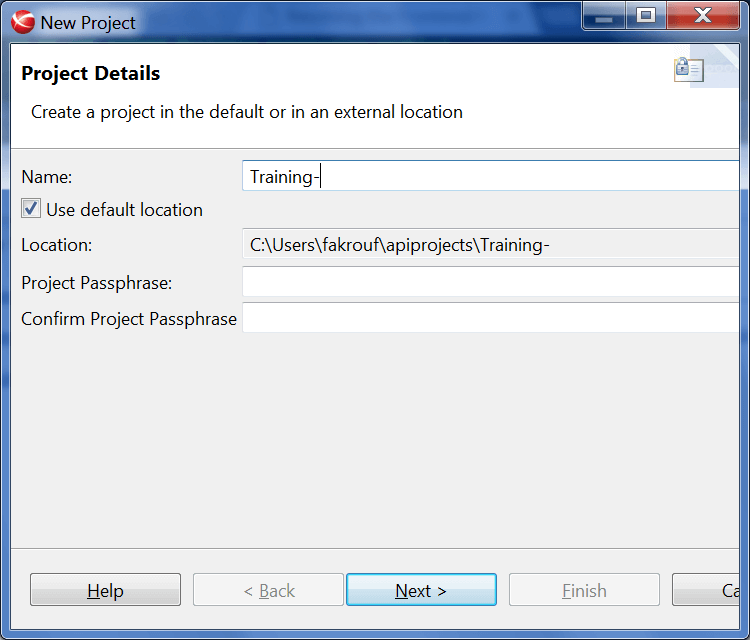
To start a new Project from an API Gateway Instance, make sure there’s a running API gateway instance. Credentials are required in the following step to get connected to the API gateway instance to download remote policies and configurations, but also to create a copy of a local machine.
Enter project name and location.
In the next step, you will be asked to provide the API gateway instance connection details. Enter the host as localhost (use IP if the instance is running remotely) and username & password. The default username & password for admin gateway manager is admin/changeme.
The following step is to select your group. Confirm this by clicking on finish.

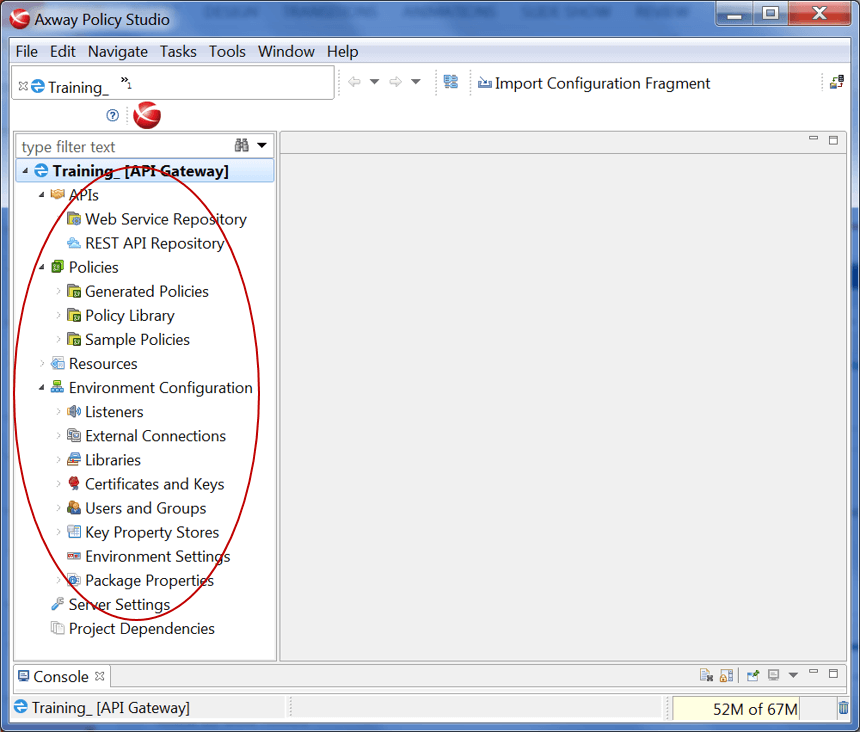
After this final step, a newly created project will be loaded with a group configuration, APIs, Policies and other objects will be effectively replicated from the connected API gateway instance (see the red circle).
A policy is set of filters, where each filter is modular unit which processes a message. A policy is visualized like a flow-chart; each filter will have a Success Path and only one Failure Path. A policy may also contain other policies, so one policy can reuse the functionality of other existing policies. This facilitates policies reuse. Each policy has a Start flow and End flow, which will indicate the starting and ending execution flow respectively, during the policy flow.
Create hello world API
Let’s demonstrate how to create & expose an API with API gateway using the Policy studio and other component.
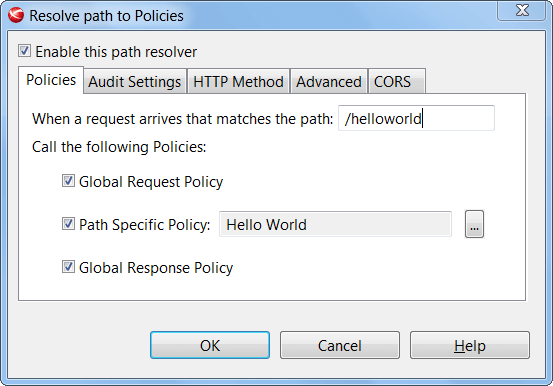
This API will be a simple HTTP path /helloworld and will return text/html content.
Steps
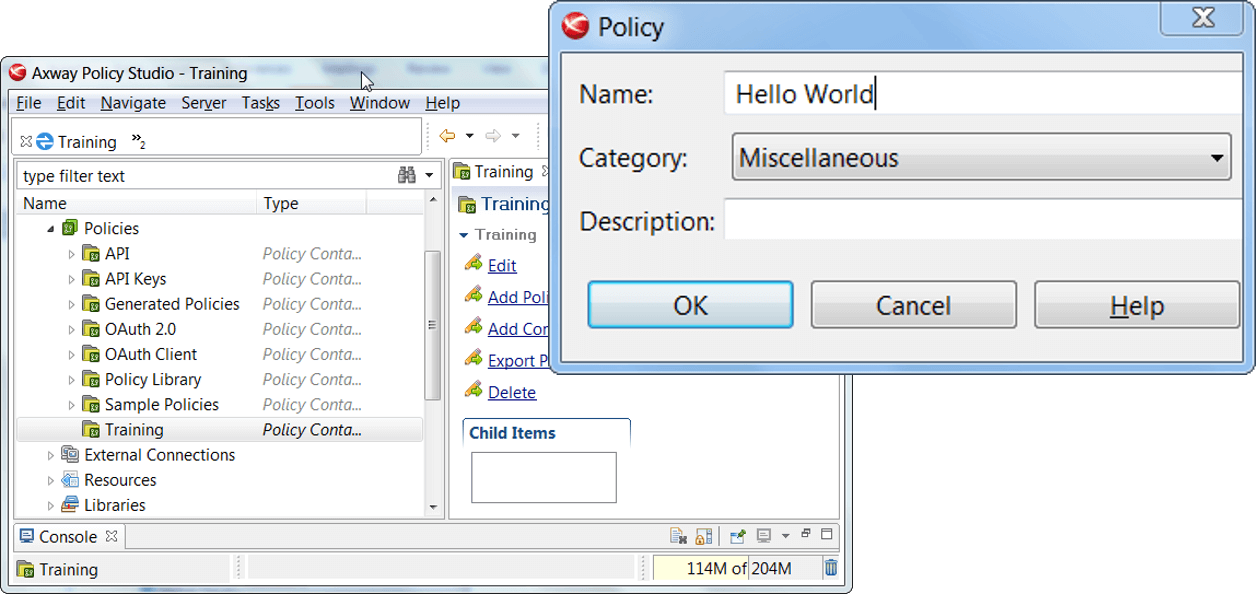
- Under Policies, create a “Training” policy container;
- Under the Training Container, add a new Policy. Name it “Hello World”
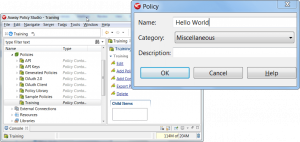
- Click OK and the “Hello World” Policy whiteboard will display. If not, double-click on the newest created Policy under “Training”.
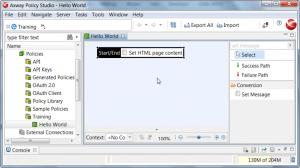
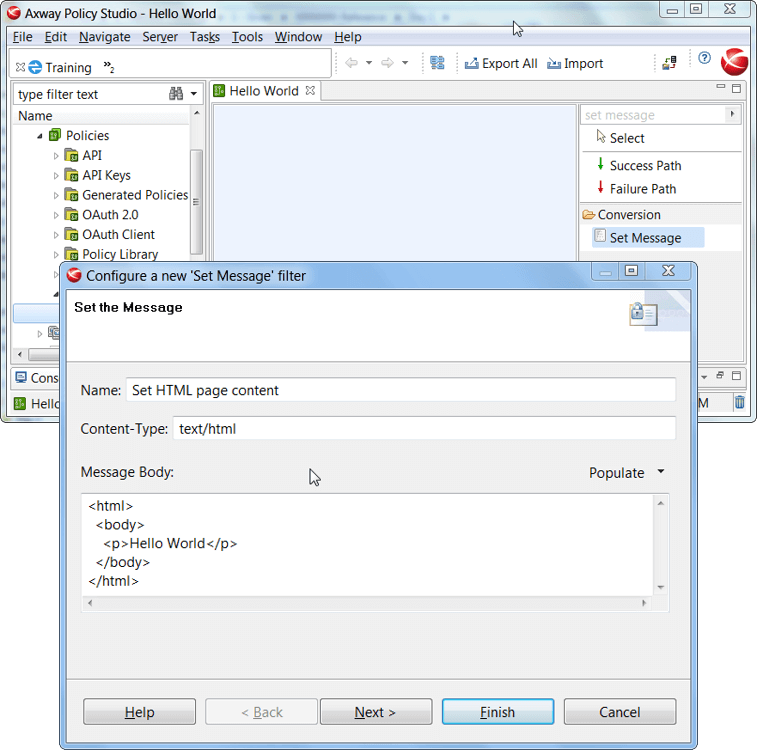
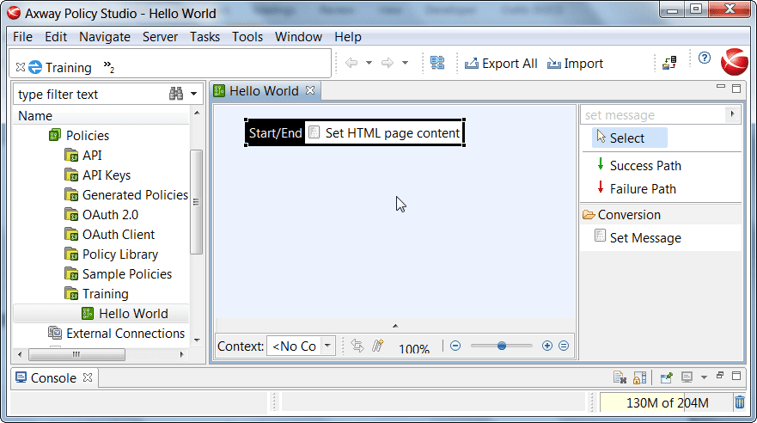
- Search for the “Set Message” Filter in Filter selection list at the right of the Hello World Policy whiteboard and drag and drop it on whiteboard in the Policy Studio.
- Enter the parameters.
- Fill in the parameters like shown in the picture and press on Finish.

- The Filter will be added to the whiteboard.
- Right click to obtain a contextual menu.
- Select ‘Set as Start’.
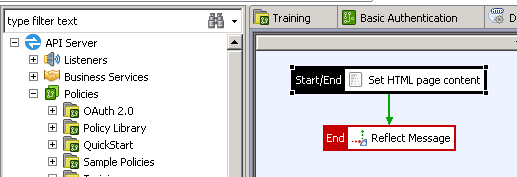
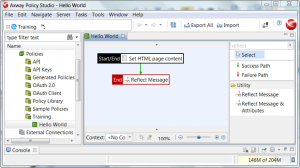
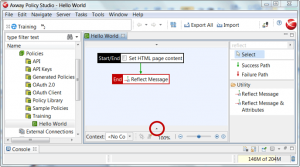
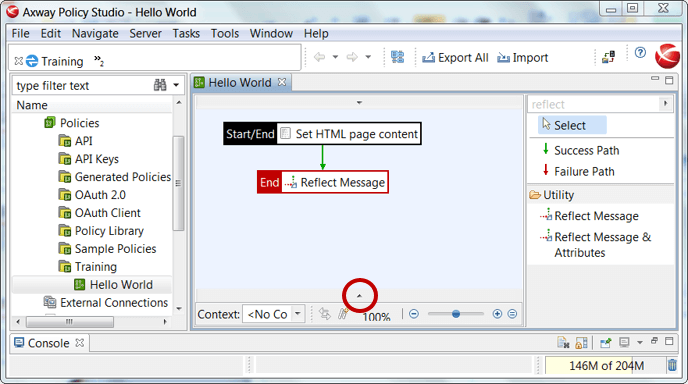
- Now, search for the filter “Reflect Message”. Drop this filter under the top:“Set Message” Filter. Leave the parameters to set their default values.
- The Policy should appear as shown in the picture below. Notice the green Success Path arrow that is added automatically.
- Now, let’s create a Relative Path that will call the policy. Click on the Relative Path button, surrounded by a red circle in the picture below.
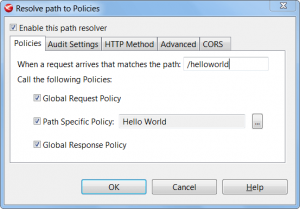
- Now, “Resolve path to Policies” wizard will prompt. Configure as shown in the below picture. The api gateway will resolve all the incoming request to this context path.
- Deploy the Policy.
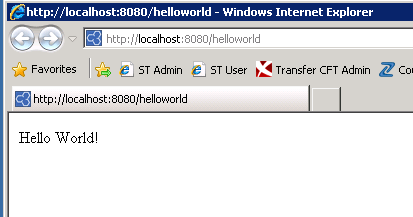
- Test API with http://:8080/helloworld

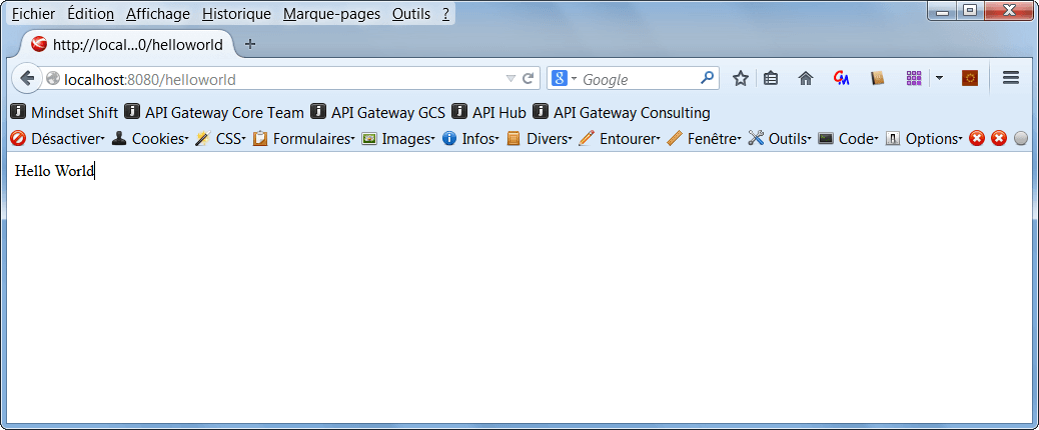
This is a hello world API, without any written code, but just configuring some filters. You can return JSON response by changing the header and message in Set Message filter.
Filters
Filter is an individual unit that executes a specific processing on a message. This message can pass through different flows within the complete policy. For example, the ‘Reflect Message’ and the ‘Attributes Filter’ returns the HTTP request headers, body, and attachments back to the client. Each filter requires input data that is stored in attributes name in and can be traced and viewed in policy execution flow.
Message attributes
Request processed at API gateway is saved in an object, called ‘Message’. All request attributes can be accessed with this object with . (dot), like accessing JSON node property.
e.g. “content.body” which carries the body of the request.
Selectors
Selectors have special syntax for evaluating expression and are available at run time, for example: ${1 + 2} returns 3.
Also, ${some.message.attribute} returns the value of the Message Attribute.
You’re able to evaluate data with a Selector from:
- Message Attributes
- Key Property Store (KPS) tables
- External databases or repositories
- Environment Properties
Faults and Errors
In a real world (production) scenario you would prefer to handle a fault and return a custom error back to client application. The solution for this scenario is using fault handling filters.
You can use the JSON Error filter to set a custom HTTP response code and JSON error content, which will be returned back to the client. Another solution could be to use `Reflect Message` by setting up a HTTP response code with a ` Set Message’ filter to return customized response.
Next
In the following blog installment, you can read everything about how you can troubleshoot:
- API;
- Check request and response messages with in API gateway;
- Improve performance implementing Cache;
- Use and leverage KPS (key property store);
- Protect & secure APIs.
For questions about this Axway API Management Policy Studio blog you are able to contact Arijit Roychoudhury, Integration Architect at Devoteam Netherlands (arijit.roychoudhury@devoteam.com). If you are interested in API Management as a solution for your business, feel free to contact Ratko Popovski, manager Architecture & Implementation at Devoteam Netherlands (ratko.popovski@devoteam.com).
» Go to the next blog about Axway API Management Caching and Security (part 3)

