Once we have our OAC instance up and running, we can launch it through the “Oracle Analytics Cloud URL” step in its menu (Screen 9).
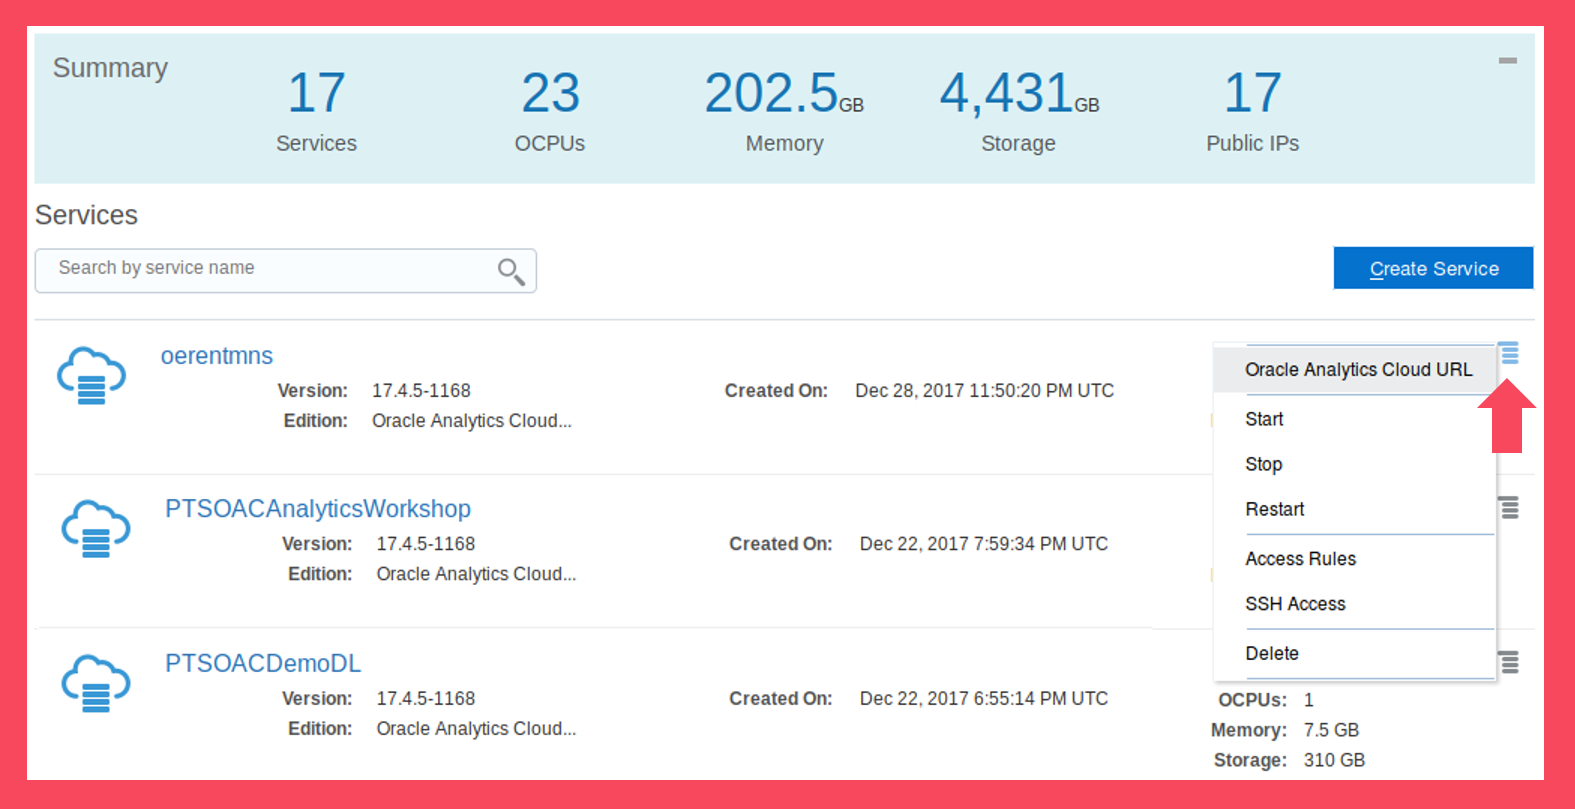
Screen 9
This will lead us to a login page, which is more or less familiar for OBIEE users.
After few seconds of loading, the OAC instance homepage will show up (Screen 11). In the homepage, there are various shortcuts to the most common tasks, as well as some tutorials from the “Academy” page.
The left panel display can be turned on or off using the button, which is marked red, in the following screenshot.
“Projects” leads the user to data visualization projects. “Data” is the page where we define our data sources. “Console” is the main screen for various administrative tasks. And “Academy” provides us with tutorials and documentation.
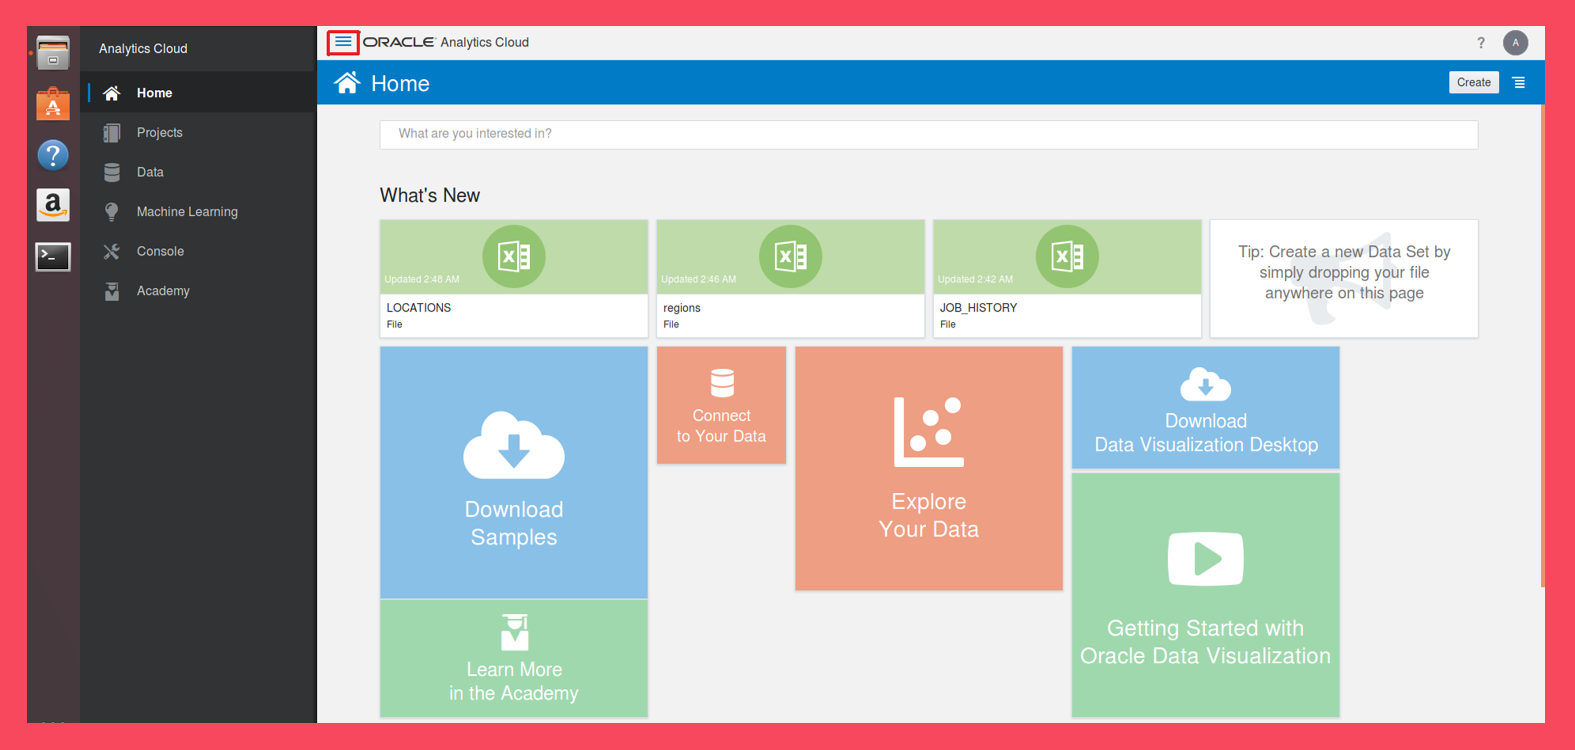
Screen 11
Step 4: Oracle Analytics Cloud – Create a Data Source
Now that we are logged in we can start creating a data source in the next step. Click the button to go to the next step below.

