The purpose of this blog series is to provide a starting guide for Oracle Analytics cloud.
We will create an OAC instance from scratch. We will then connect to a Cloud data source, and build a star-schema model using the Cloud Data Modeler.
Using this model, we’ll make a simple analysis, and related prompts for filtering its data. We will also create visualizations; and combine all of them in a simple dashboard.
Creating an Oracle Analytics Cloud Service Instance
First, open the service console on the homepage of our Oracle Analytics Cloud domain (Screen 1).
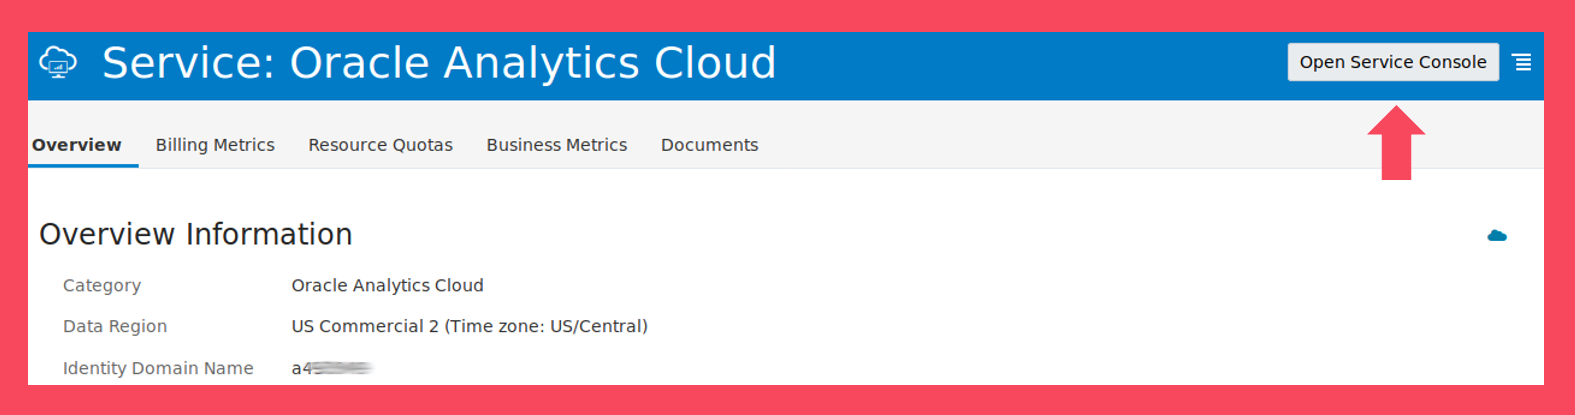
Screen 1
The service console gives a list of existing services. On top of the list, we can see aggregated metrics regarding the existing services; such as the OCPUs, memory, and storage used.
Let’s initiate a new service using the “Create Service” button (Screen 2).

Screen 2
The Oracle Cloud Service Instance creation process will be initialized after we provide the required details.
Before doing that, Let’s focus on the pre-requisites. First, we need an Oracle Database in Cloud – at least 1 OCPU DBaaS standard. Besides that, we need an Oracle Infrastructure in Cloud (Iaas) as well for network and storage. We’ll address these in the second screen.
The first screen below (Screen 3) contains some basic information, such as the Name of the instance, the edition to be created, SSH public key, and an e-mail address to receive the notification when the service is successfully created (or failed).
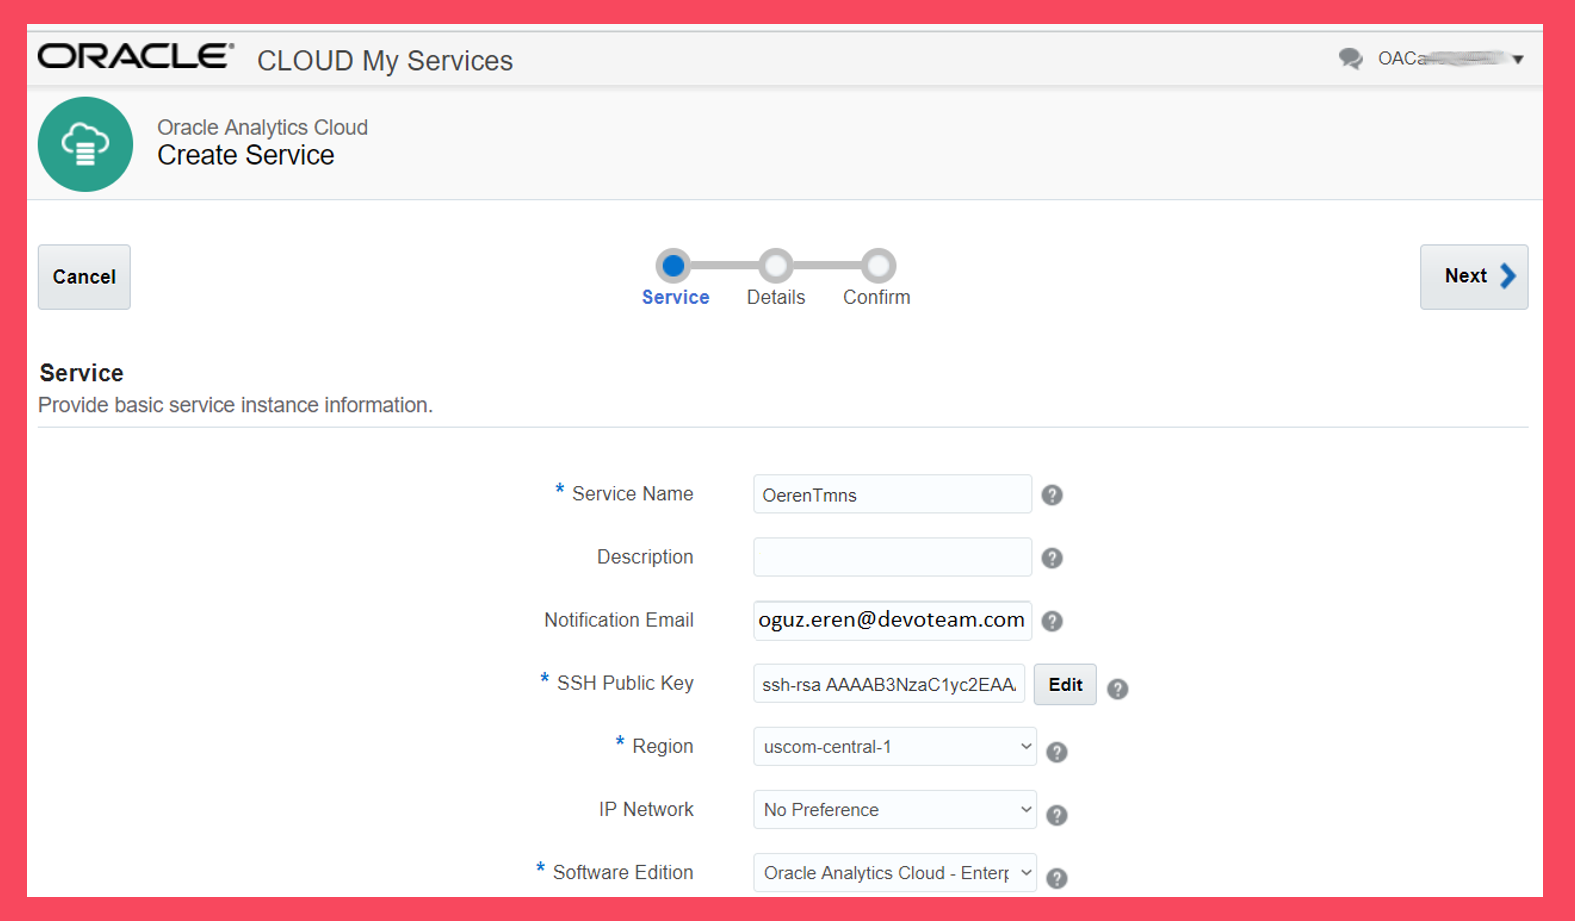
Screen 3
The second screen (Screen 4) is where we address the IaaS (“Cloud Storage Configuration” section) and DBaaS (Database section); as mentioned above. Since the same database can be used for multiple OAC service instances, “Schema Prefix” is used to distinguish their objects from each other.
The “Next” button of the second screen validates the connections to DBaaS and IaaS. The third screen (Screen 5) is a last confirmation before the service creation process is started.

Screen 4
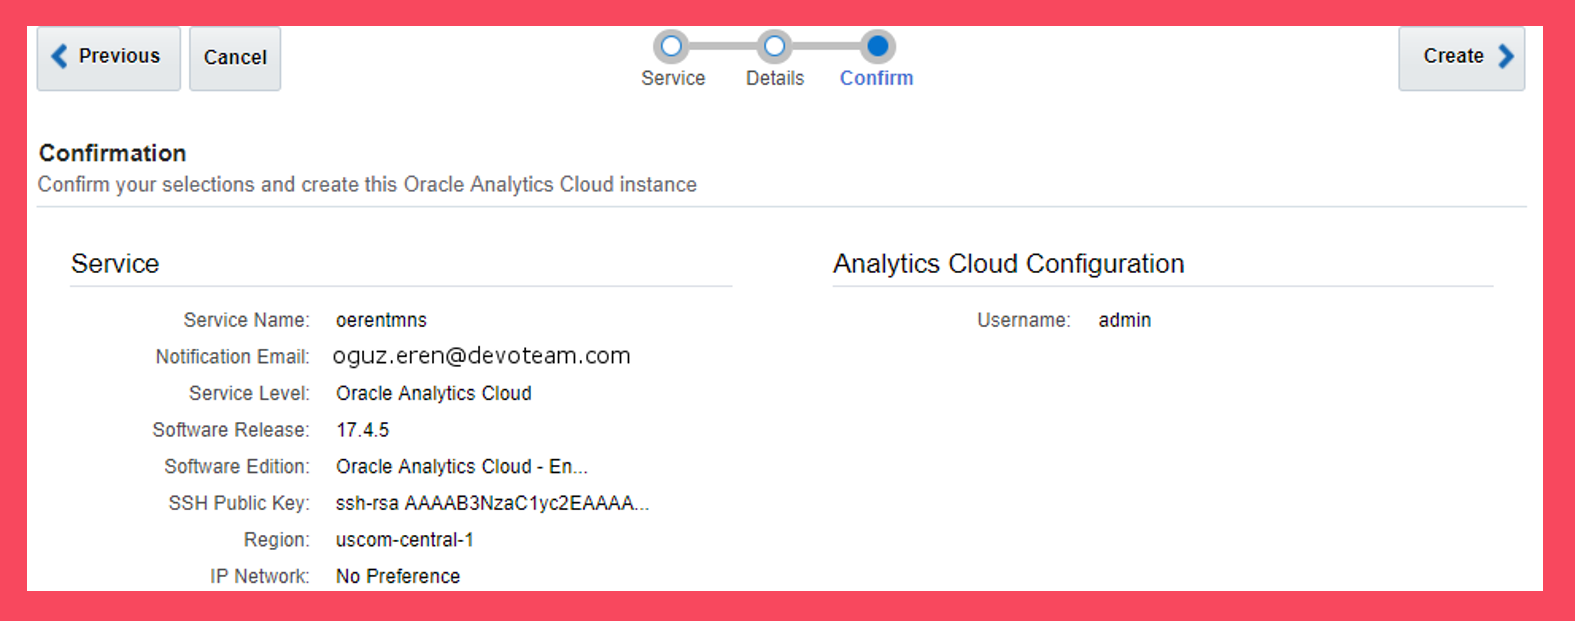
Screen 5
Once the service creation process has started, the service begins to appear in the Services screen (Screen 6). Where it differs from other services with its icon, and the additional “Status” attribute.
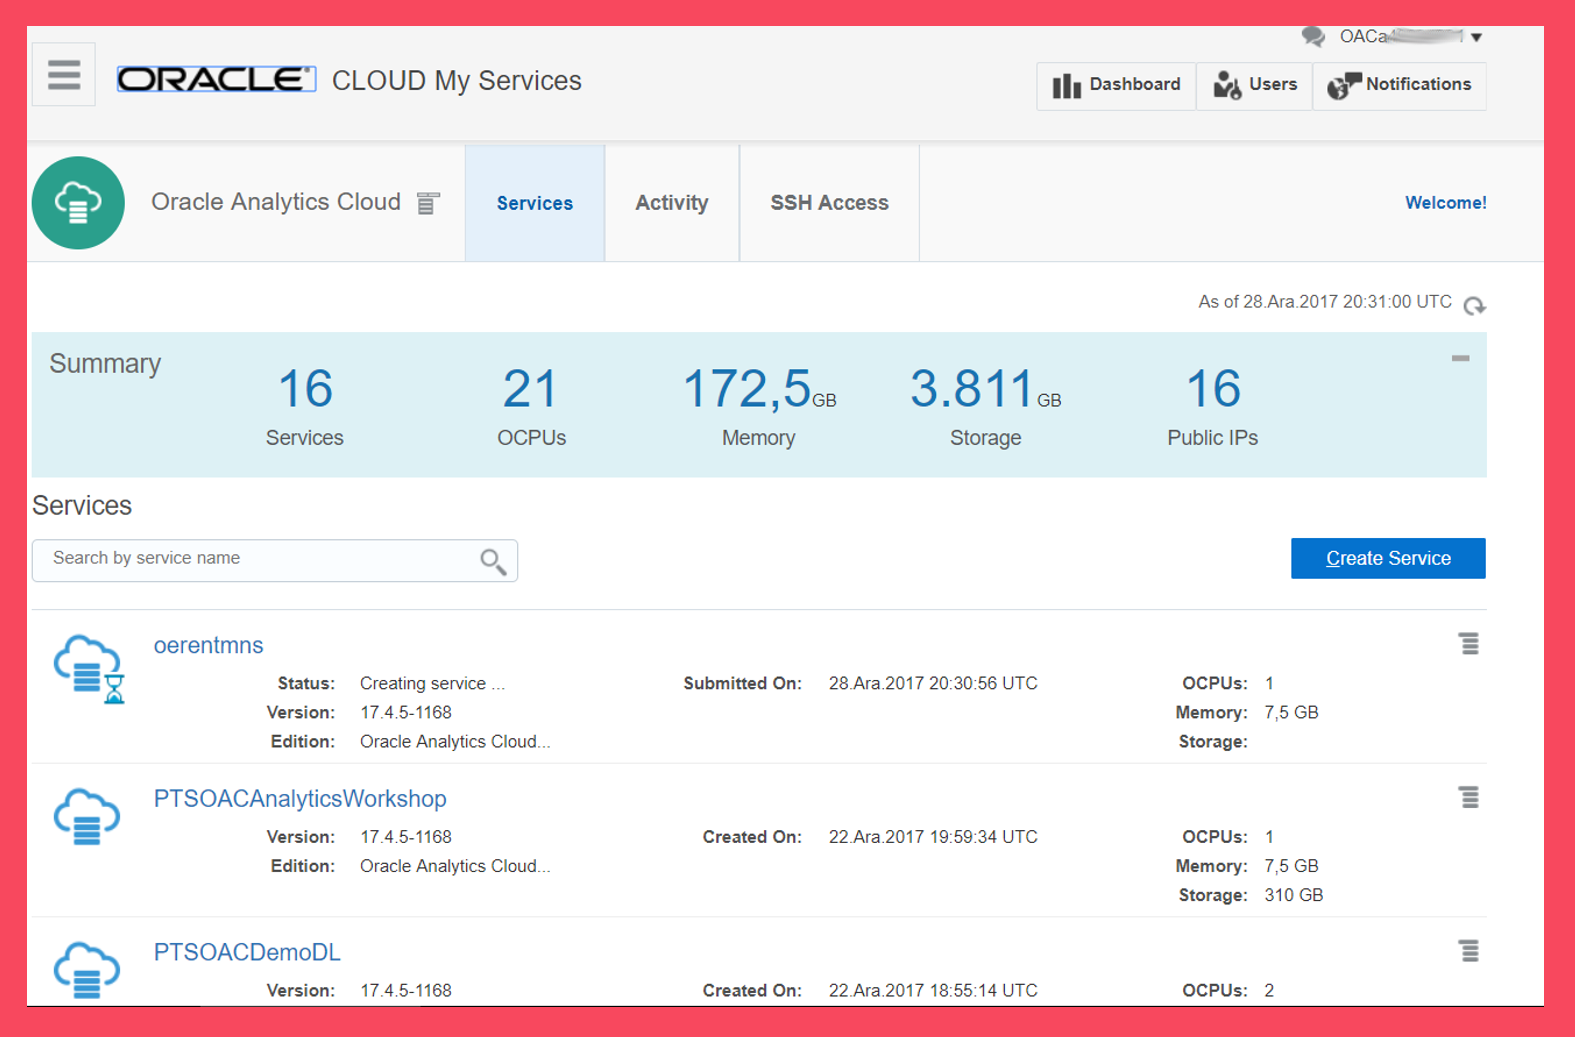
Screen 6
To learn more about the service creation process, we can open the service overview page and track the logs at the bottom of the page (Screen 7).
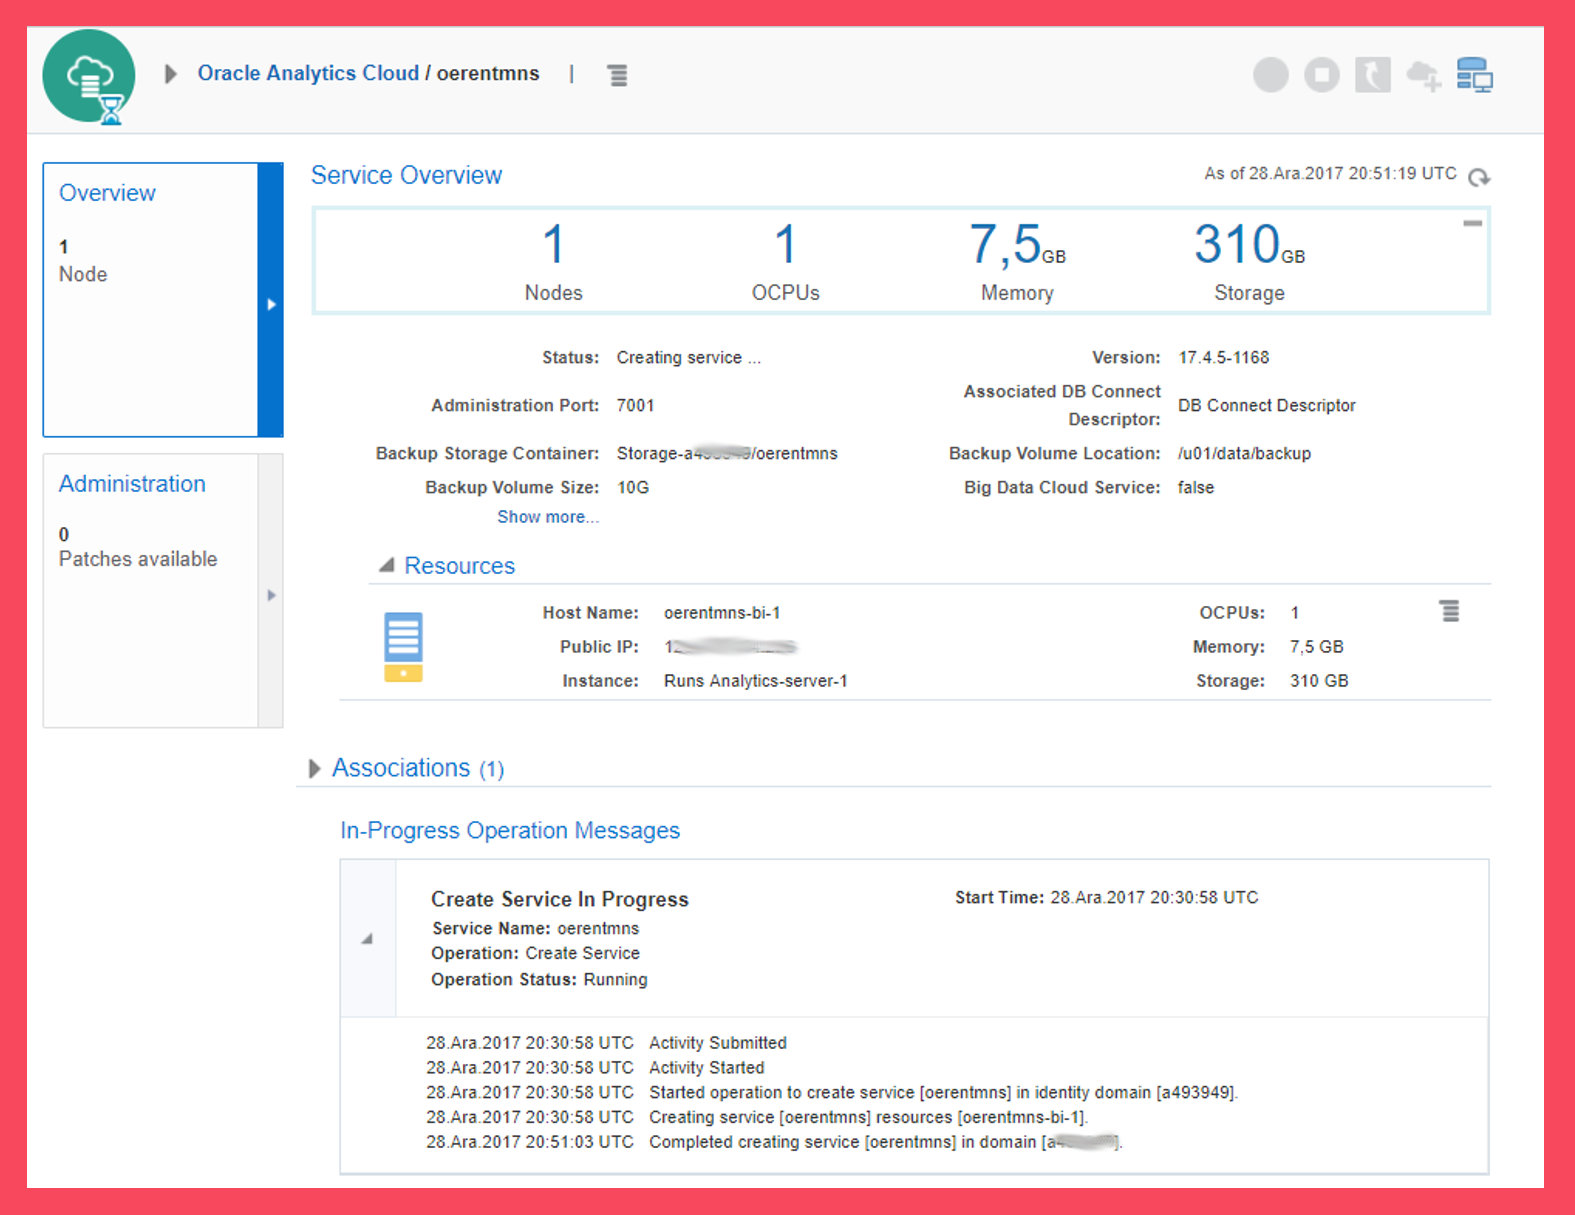
Screen 7
Now find some coffee (or two). Ok, maybe a quick lunch. When you return, you’ll hopefully see the following notification in your inbox (Screen 8).
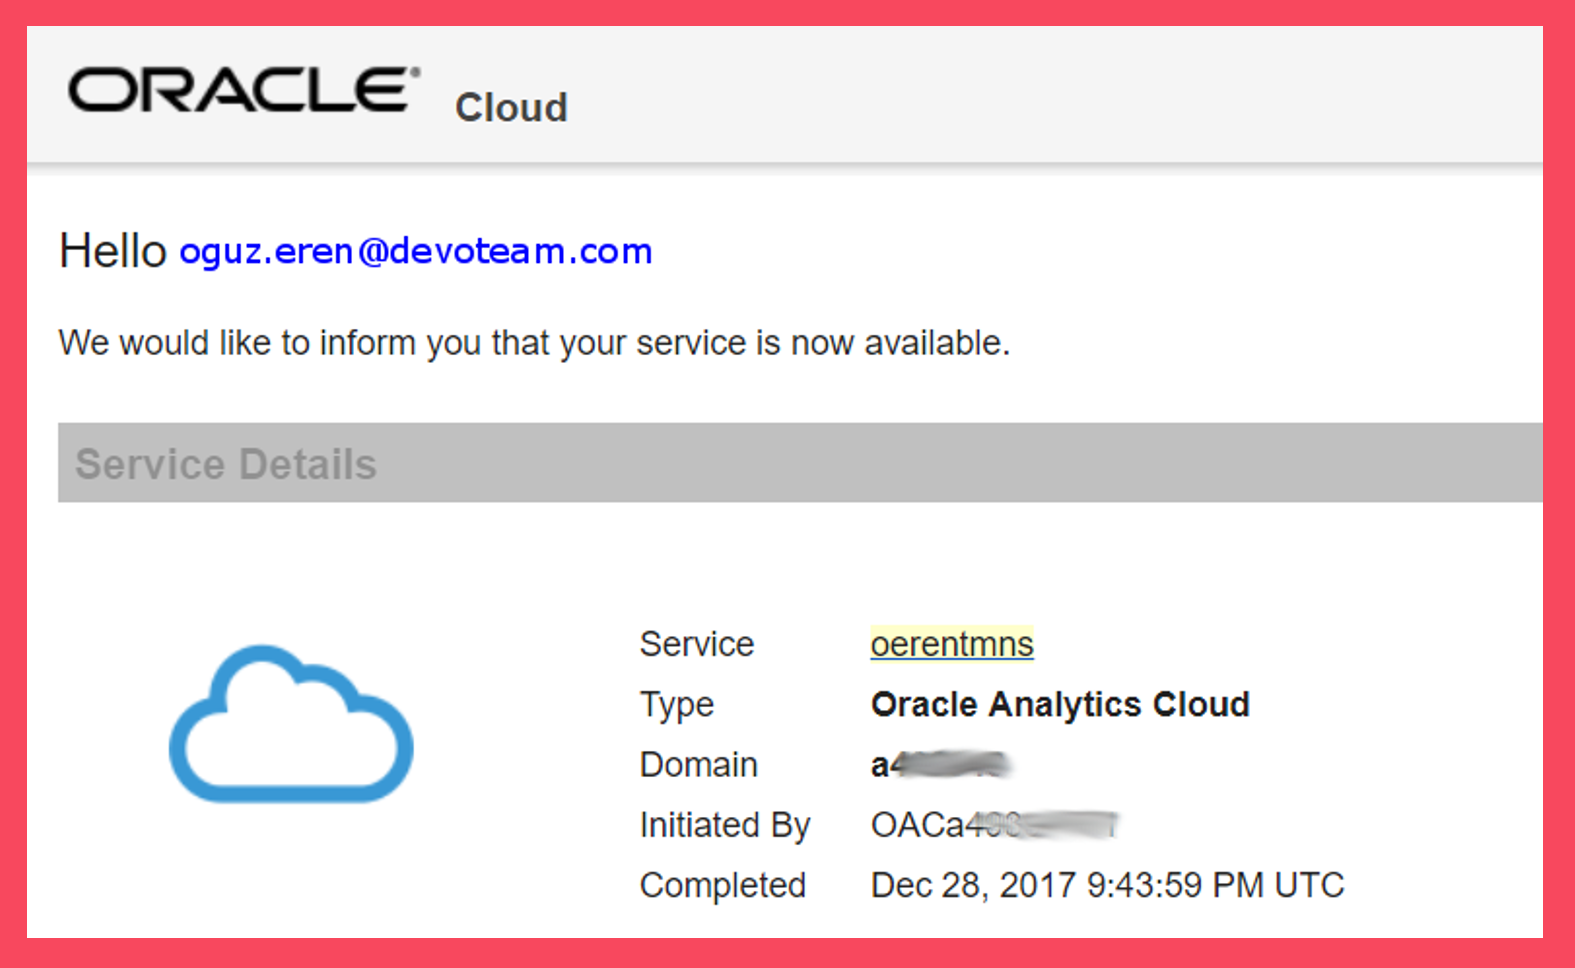
Screen 8
Step 3: Log in to the OAC Instance
Now that we have created an instance we will log in to it in step 3.

