
A dedicated load balancer must have at least one certificate associated with it in order to create it. A DLB can have multiple and independent SSL endpoints, each identified by its server certificate’s common name.
To configure an SSL endpoint for our load balancer to serve the clients, we need to provide a certificate and private key pair for our load balancer. I want this article to be a complete guide to whoever would like to create Anypoint Dedicated Load Balancer. Actually adding a certificate to the DLB is pretty straightforward and you will probably get the certificates from the security team or another department that is in charge of managing the enterprise certificates. But even then you can face some challenges that cost you some time like they might ask you for a CSR, they might provide the public key without the chain, they can send you the private key encrypted, etc. Also for clarity, I will give some guidance on how to create a self-signed certificate with OpenSSL. So you might as well give the CSR and make it CA-signed.
Create A Self-Signed Certificate
In order to set up a DLB, you need to have both public and private, PEM encoded, unencrypted, ideally, CA-signed certificate files. As we mentioned, you can either ask this from the company that you are working with or you can do it yourself.
For the tutorial, we will use OpenSSL to create and sign the certificate. The certificate will be self-signed, which that means even though it will enable us to use SSL, it will not be considered trusted. So while you are calling this API from a browser or postman you will see that the certificate is not trusted.
I am using a Windows computer at the moment, so directives will be for Windows but it is almost the same for other OS as well.
First step; install OpenSSL. If you already have Git for Windows, you may simply go to the Git installation directory, find \usr\bin\openssl.exe and run it or run the Git Bash and use the “OpenSSL” command. A third option would be to add the git OpenSSL path to the environment variables so you can access OpenSSL from cmd and anywhere.
Open cmd (or from the bash, OpenSSL) and pass this command:
openssl req -x509 -newkey rsa:2048 -keyout dlbk.pem -out dlbcert.pem -days 365
This is the step you will be creating both the private key and the certificate that you signed with that key. After executing the command you need to enter a password for the key.
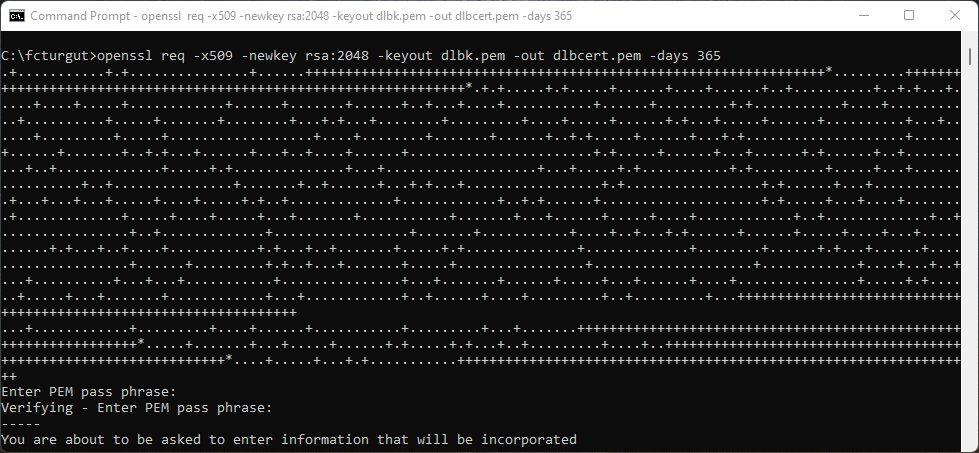
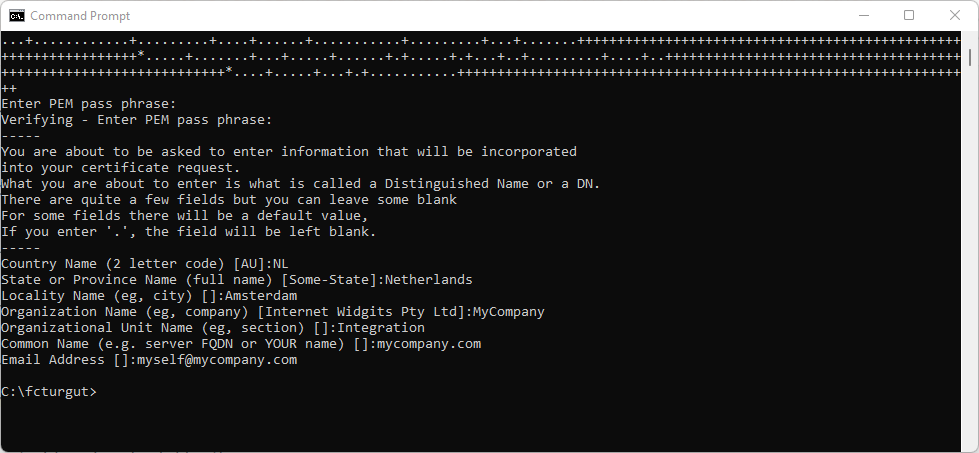
As it guides you through a bunch of information, since it is for test purposes, fill them as you wish or skip them.
Remember the password that we enter in the beginning because now we have a private key as encrypted since we didn’t pass the “-nodes” (no DES) in the command but DLB will require you from an unencrypted key. You can observe it with the “type dlbk.pem” command:
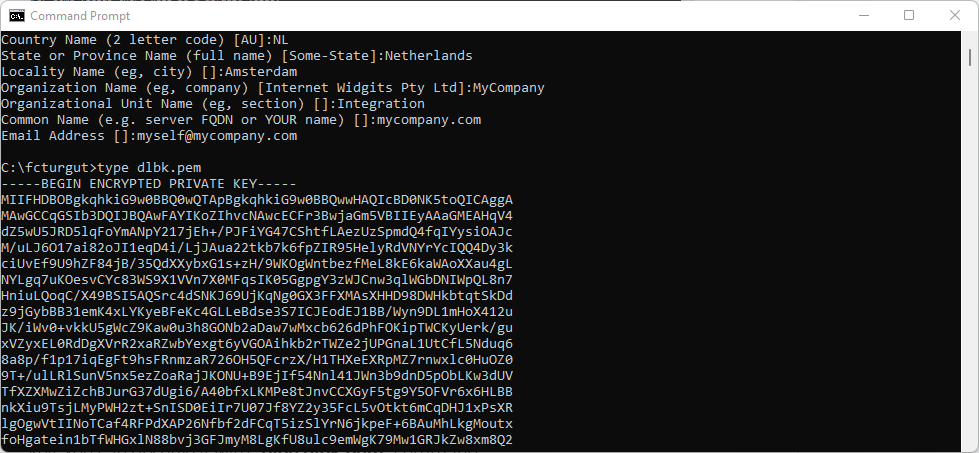
As you can see it is an Encrypted Private Key.
We will test this in the process of creating the DLB. But for the moment let’s pass this command as well to get the decrypted version:
rsa -in dlbk.pem -out undlbk.pem
You will be asked for the password you entered at the beginning. Then you will have your unencrypted private key as well. You could have passed the “-nodes” expression in the command as well to get the unencrypted private key directly.
It is not recommended to use this self-signed certificate in production environments. So if you are planning to use that, create a certificate request and make it signed by a CA authority. You may use a free provider such as Let’s Encrypt, but they only offer domain validation and it is for only 90 days. Every 90 days you need to update the certificate.
If you are not going to go through that and be provided directly, you must request the following steps from the security team or whoever the certificates are provided by;
- Certificates must be pem-encoded.
- The private Key has to be unencrypted.
- All the key attributes and bag attributes must be removed.
- Files must contain the entire certificate chain and that chain has to be ordered sequentially. If those are sent to you separately you can simply append them to a text editor. The order of the certificates in the file must be:
- Certificate for the DLB
- Certificates for intermediate CAs
- Certificate for the root CA
Adding to those items, if you or your company would like to use a vanity domain, you can set a CNAME record in your corporate DNS nameserver to mask the “lb-name.lb.anypointdns.net” domain to your company’s “vanity” domain. We already saw some examples here. I will share another CNAME mapping example after we create the DLB, so we will have the Anypoint DNS of the created DLB.

