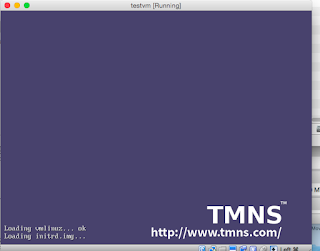
The web is full of recipes on how to use VirtualBox to create a virtual machine image from scratch using an ISO image (and “orchestrated” this process by using another tool like packer, unfortunately, packer does not yet “orchestrate” the following recipe).
This page describes the way to install using only the boot files belonging to the operating system (OS) you are installing. VirtualBox comes equipped with a built-in PXE-boot server. VirtualBox takes care of the tftp and dhcp servers involved.
After installation, you can use VirtualBox to create an appliance ready to import in most hypervisors or use as a base box to build other appliances with Vagrant and VirtualBox as a Provider.
Operating systems supported
You should be able to use this recipe on every host operating system that is supported by VirtualBox. All commands below are written with Unix/Linux in mind. So for, e.g. OS X, you should change the ~/.config part to ~/Library (and think of some alternative for /etc/hosts or use IP addresses). Everything is expected to work the same way on Windows, so feel free to translate everything to Windows speak, the “VBoxManage” command is also included on Windows (maybe you need to find an alternative for “ln” or just copy).
As guest operating system (the one you are installing) you should be able to use everything that supports PXE boot (e.g. see this page for OmniOS). For Linux this means you need to use SYSLINUX, PXELINUX and the way to install your favourite distribution hands free (Kickstart for any Enterprise Linux (e.g. CentOS) or even Ubuntu and ESXi, for most Debian based flavours you might prefer Preseed). Of course you can also install that other family of operating systems.
Create a virtual machine
Use the VirtualBox command line to create a virtual machine definition. In the example the lowercase alias is used, <myVMs> refers to the directory where your virtual machines are stored. You should use what applies to your system and preferences (e.g. translate stuff to Windows speak).
See sample script create_vm.sh.
Configure VirtualBox PXE boot
-
Get the required boot images
- Select the nearest mirror for the distribution of choice (e.g. CentOS)
- Navigate to the isolinux directory (7/os/x86_64/isolinux/)
- Optionally create a nice boot splash to show during boot when not running headless, see example below.
-
Create a TFTP root directory in your VirtualBox configuration directory (where your VirtualBox.xml is, usually
~/.config/VirtualBox/VirtualBox.xmlon Linux, ~/Library/VirtualBox/VirtualBox.xml on OS X)- If you are working with multiple OS-es, eventually rename the directory and create a symbolic link named TFTP to the flavour you are currently installing.
-
copy the (downloaded) required syslinux files, if you run Linux, you have them locally available (usually the exact version should not matter).
mkdir ~/.config/VirtualBox/TFTP
cd /usr/share/syslinux/
cp pxelinux.0 ldlinux.c32 libcom32.c32 libutil.c32
  vesamenu.c32 ~/.config/VirtualBox/TFTP/
-
create a directory “
pxelinux,cfg”mkdir ~/.config/VirtualBox/TFTP/pxelinux.cfg
-
create a SystLinux menu/boot configuration (eventually use the isolinux.cfg as an example:
$ vi ~/.config/VirtualBox/TFTP/pxelinux.cfg/default
-
When you are installing any Enterprise Linux version, you can add a Kickstart configuration to load (make it the default for handsfree installation).
-
Copy the kernel and
initrd, e.g. from the mounted installation media:$ cp ~/Downloads/vmlinuz ~/Downloads/initrd.img ~/.config/VirtualBox/TFTP/
MyVM=testvm
cd ~/.config/VirtualBox/TFTP/
ln -s pxelinux.0 ${MyVM}.pxe
vboxmanage modifyvm ${MyVM} --nic1 NAT --nictype1 virtio
vboxmanage modifyvm ${MyVM} --boot1 net --boot2 disk --boot3 none --boot4 none
$ vboxmanage modifyvm ${MyVM} --nattftpfile1 ${MyVM}.pxe
Complete the process
vboxheadless --startvm ${MyVM}