

CI/CD Pipeline implementation, or Continuous Integration/Continuous Deployment, is the backbone of the modern DevOps environment. Snowflake however does not have out-of-the-box integration capabilities with any of CI/CD tools which is a struggling part for many of the users. In this expert view I will share knowledge on how to set up CI/CD for Snowflake using GitHub and Jenkins.
Prerequisites:
- Active Snowflake Account
- A Snowflake Database
- Snowflake CLI
- A Snowflake Service account/User created with appropriate permissions
- Github Repository
- Jenkins Server
- Key Management Service(optional)
Getting started:
- Snowflake is a data warehouse built for the cloud for all your data & all your users. Learn more about our purpose-built SQL cloud data warehouse
- Jenkins is an open source automation tool written in Java with plugins built for Continuous Integration purpose.
I assume, as a developer, you already know about GIT, so skipping a GIT intro. I will begin with explaining how to deploy Snowflake scripts into a Snowflake database using Jenkins’s interface. The key for this integration is writing the Jenkins file and placing it in Git Repo. As you see below, there is a GIT repo which contains:
- ADHOC_SCRIPTS folder: To execute any adhoc snowflake scripts
- ALTER_SCRIPTS folder: Scripts related to altering existing table/view/object structure in Snowflake database
- CREATE_SCRIPTS folder: DDL related to Snowflake Objects
- INSERT_SCRIPTS folder: DML related to Snowflake Objects
- Jenkins file: which is the key here for CI/CD
- Docker files: For Snowsql.
First 4 folders can be replaced with a single folder as well, but we will run into maintenance difficulties, so it is always preferable to have separate folders.
The Jenkins pipeline depicted in this blog deploys one script at a time. Once the pipeline is provisioned it expects manual input of the script path, optional DB name prefix if DB is not mentioned inside the script and confirmation to proceed with deployment. The script can exclude database name or can include parameterized database name with SNOWFLAKE_ENV variable.
Step 1: Setting up the agent, environment, and optional timeout for input
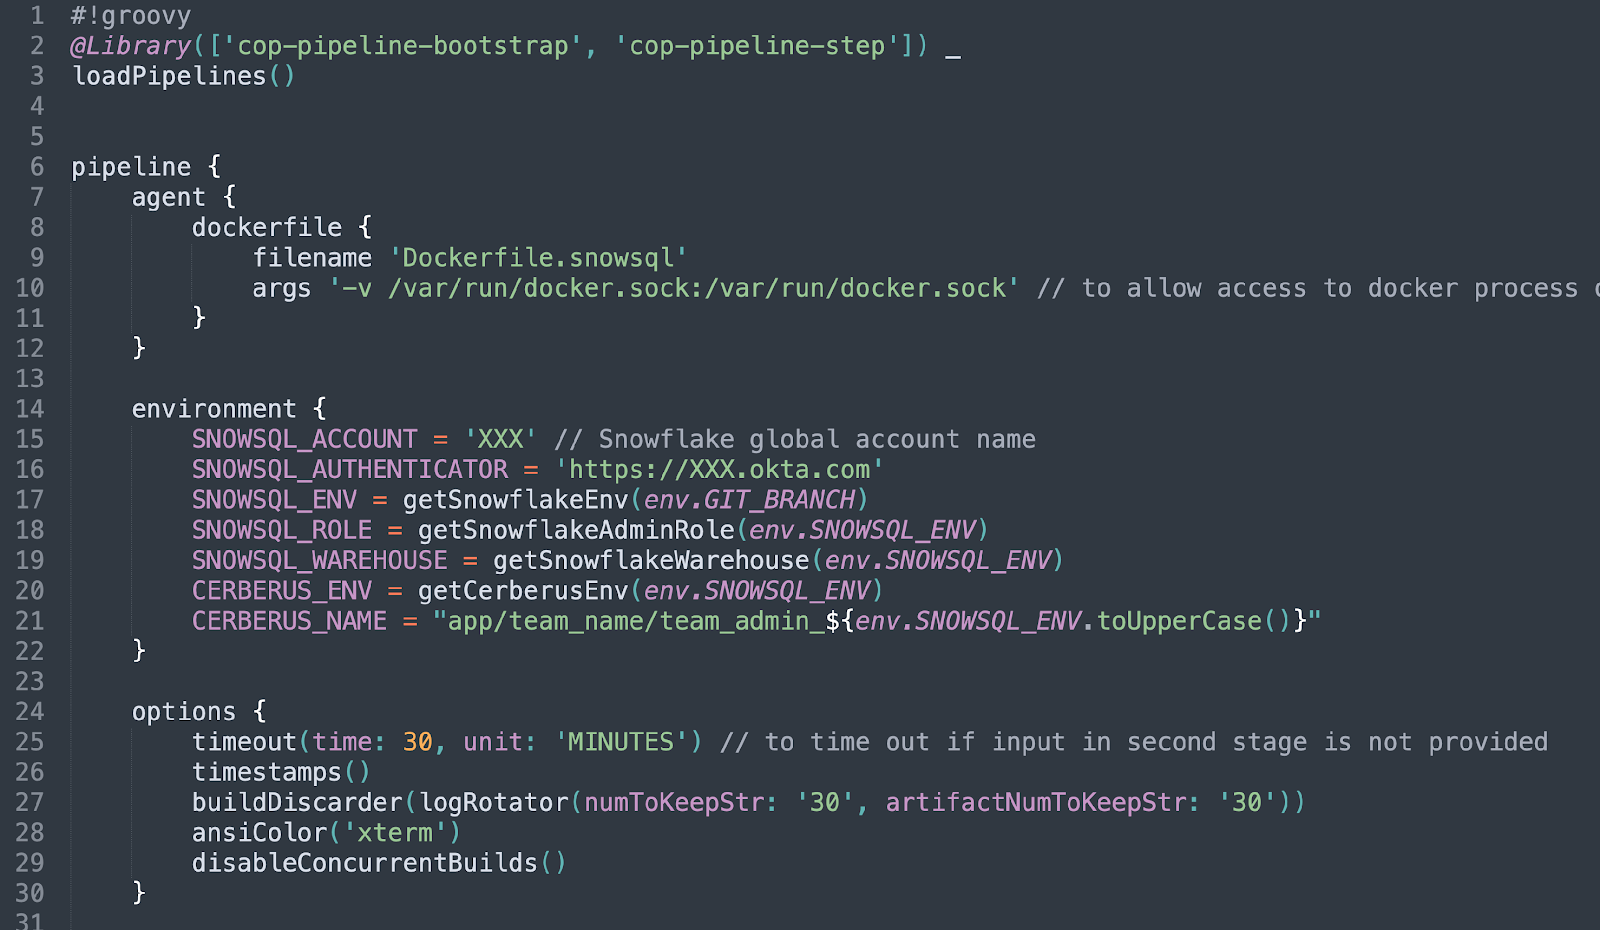
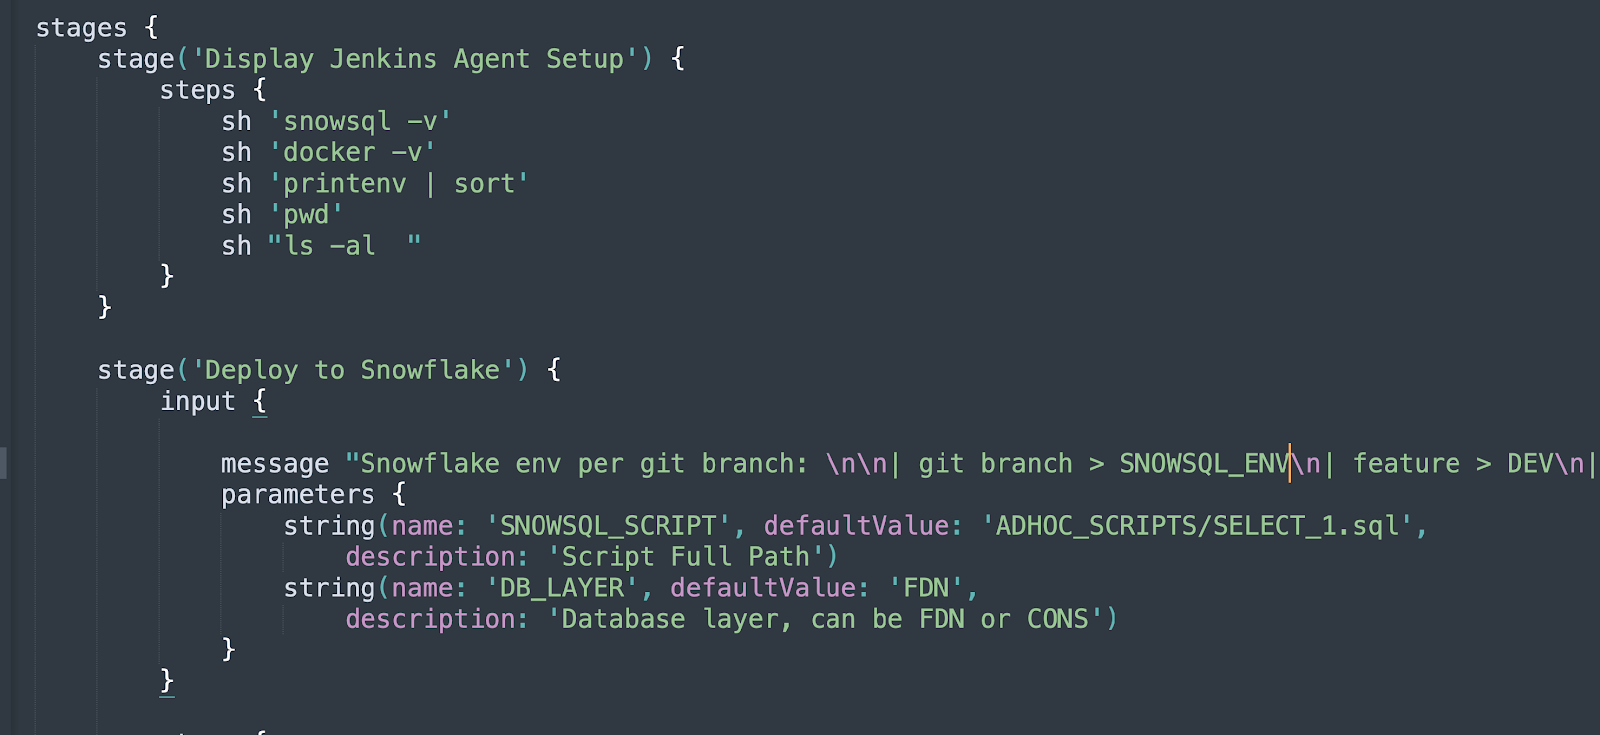
Step 2: Setting up 2 stages
- Display Jenkins Agent Setup
- Deploy to Snowflake
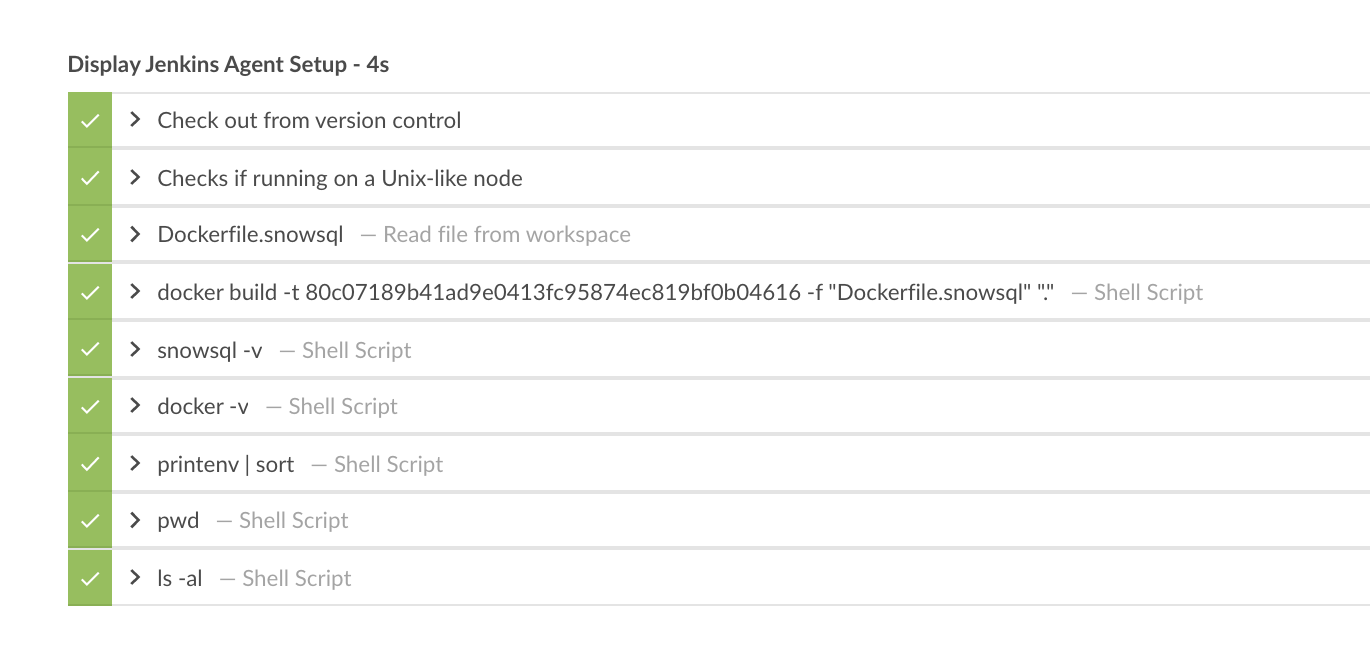
Display Jenkins Agent setup:
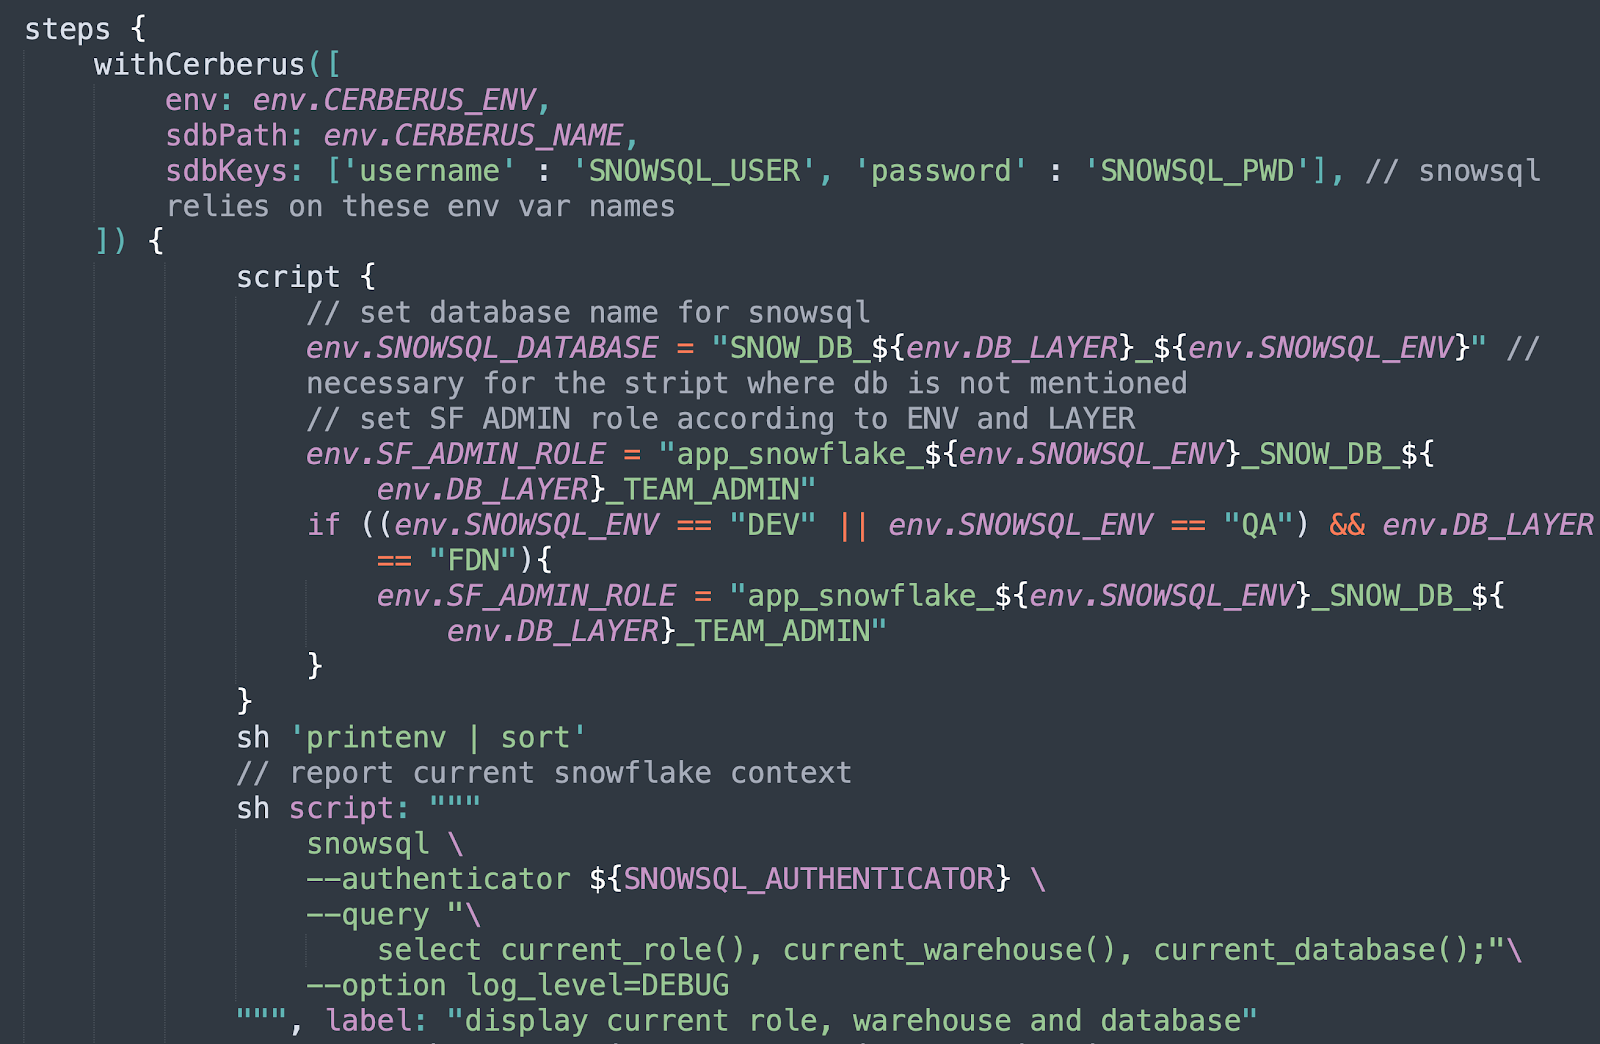
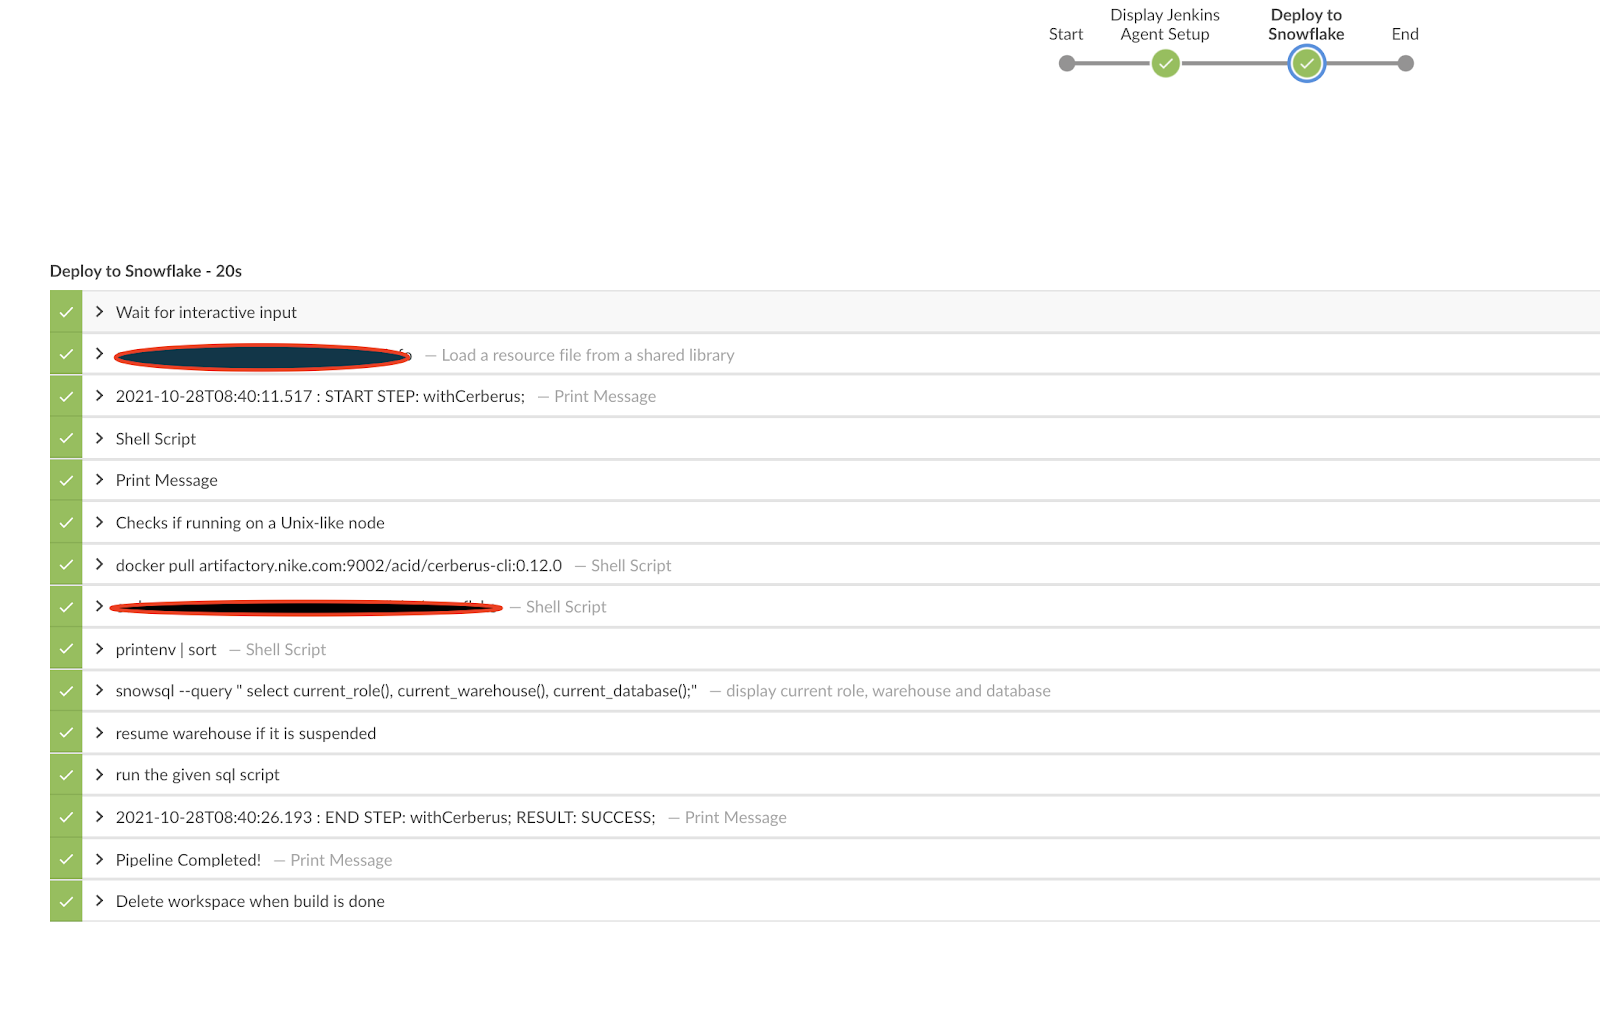
Steps in the “Deploy to Snowflake” stage:
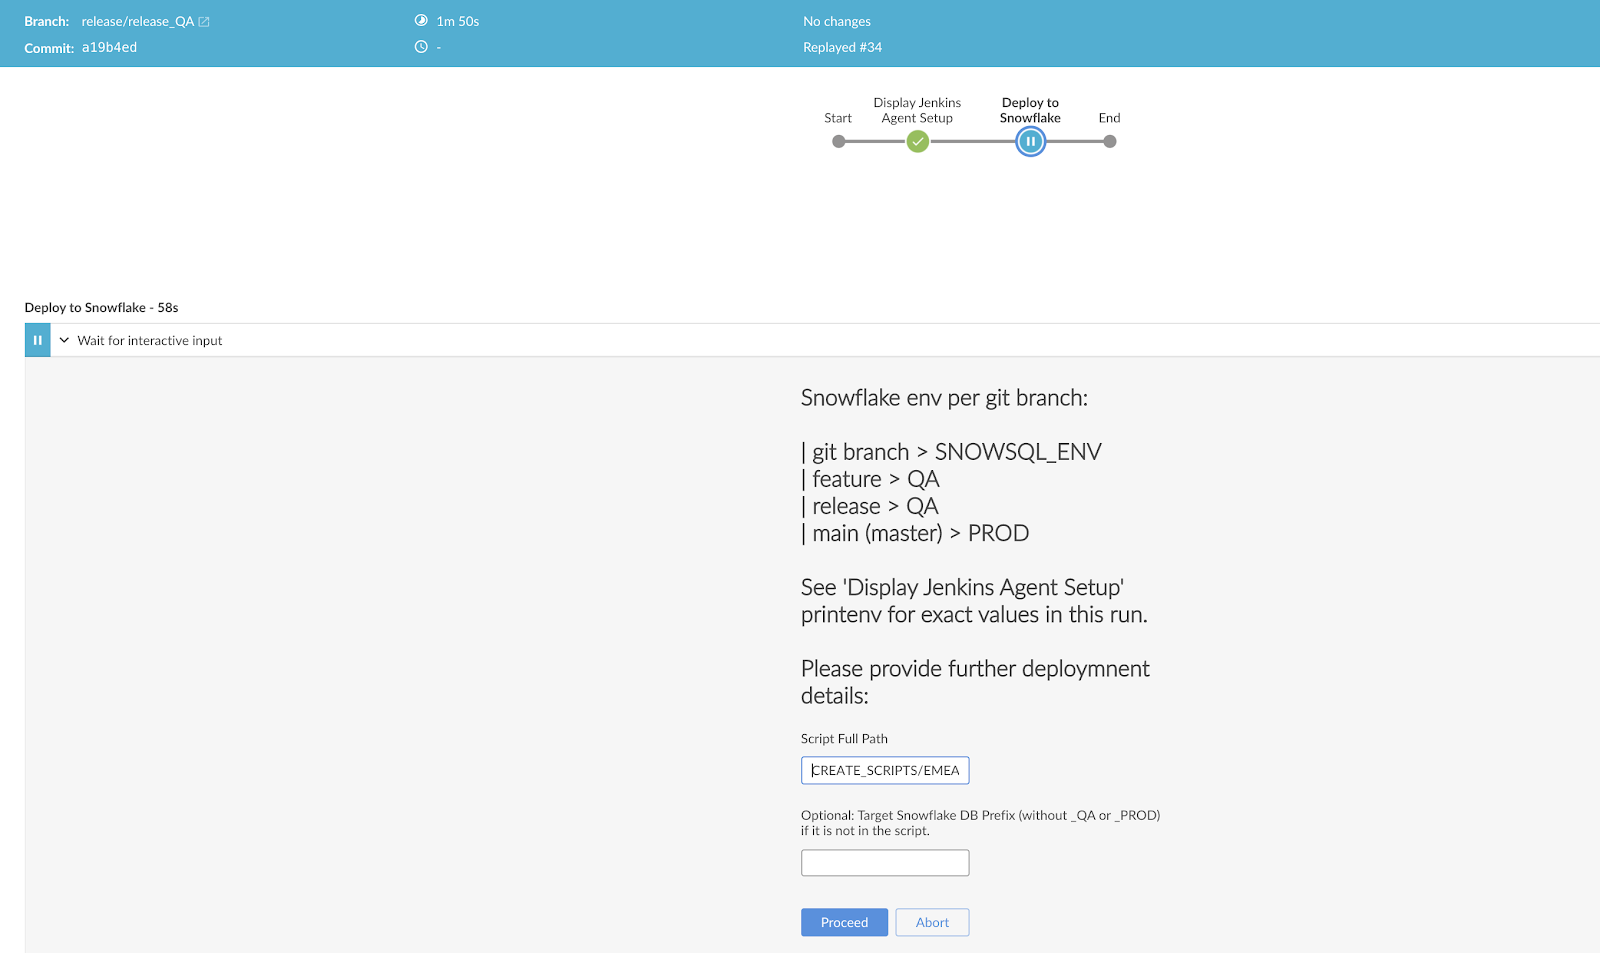
Once you Open Jenkins in Blue Ocean, interface looks like below:

During Jenkins Agent setup, below steps will be performed:
Once the flow moves to the Deploy to Snowflake step, we have to feed the script name which is supposed to be executed.
By this stage, script execution is completed and we can validate the changes in the Snowflake database.
Conclusion
Snowflake -> Jenkins integration makes life much easier for developers. Considering the lack of CI/CD support offered from Snowflake, using this integration saves a lot of time and effort.
About us
At Devoteam in the Netherlands, we promote technologies to have a positive impact on people and the world around us. Whatever stage of your digital journey your organization is in, we’re here to help you leverage the unique capabilities. Getting you where you need to be, faster. With more than 20 years of experience in Cloud, Integration, Data, and DevOps in both local and international markets, and with more than 2000 satisfied clients we guide organizations to digital competitive advantage.

