This is a technical post that wants to achieve the following goals regarding TIBCO EMS bridging:
- Create topics and queues through scripts
- Set the bridge property between a topic and a queue based on a selector
- Configure the queue’s properties to receive the message automatically for a specific number of time at specified intervals in case of errors
- Copy messages from the $sys.undelivered queue and publish them to a destination queue
The steps are described taking in account a TIBCO installation on a Windows machine.

Step 1
Open a text editor in order to create the “.script” file to be executed in the TIBCO EMS server; type the following commands and save the file on the disk.

Note: when the retry mechanism is in place it’s advisable to set the prefetch value to 0, in order do not experience unexpected behaviors.
Step 2
Start the TIBCO EMS server either from the service list or from the TIBCO EMS Administration Tool.
Step 3
Open a command line and go to the “%TIBCO_HOME%/ems/8.1/bin” and run the following command:
C:TIBCOems8.1bin>tibemsadmin -server “tcp://localhost:7222” -user your_admin_user -password your_admin_password -script E:ScriptNameSavedAtStep1.script
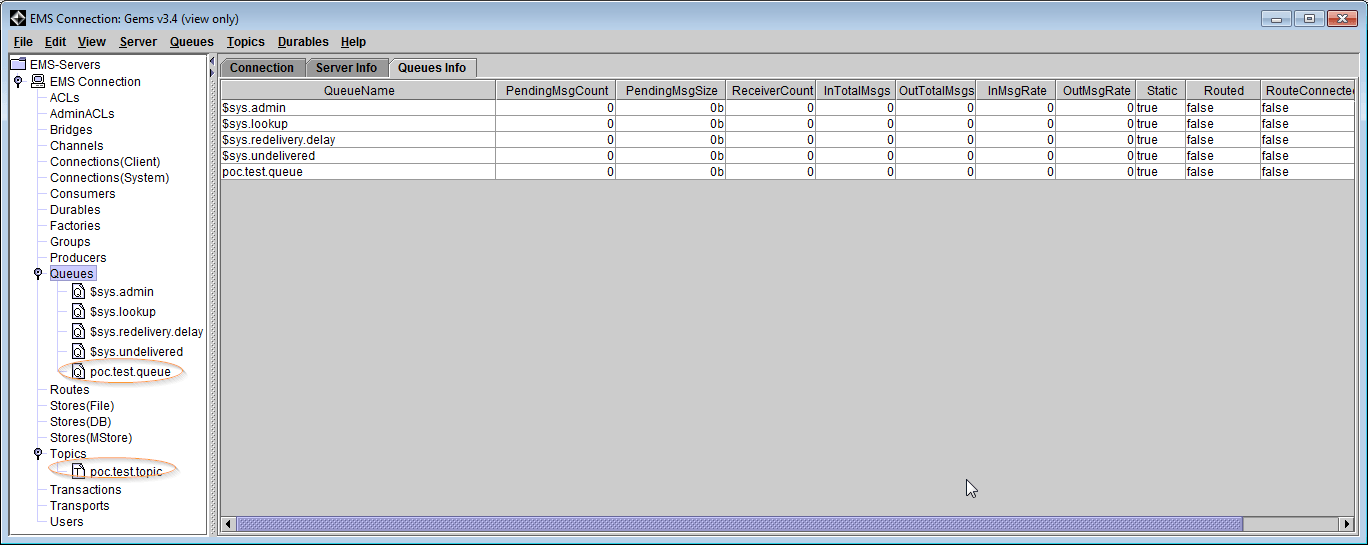
Using the TIBCO EMS administrator tool or the GEMS tool it’s possible to see the queues and the topics created.

Step 4
In order to proceed with the steps it’s required to have a client in order to send a message to the topic and test the bridge mechanism with the selector. The tool used to build the client is TIBCO Designer. The aim of this step is to show the message configuration and the bridging mechanism working properly. Since there aren’t queue consumers active, the message will be persisted in the queue on the EMS server, showing as pending message.

Note: the delivery mode set to PERSISTENT and the JMS property JMS_TIBCO_PRESERVE_UNDELIVERED have to be explicitly set on the consumer side, before publishing the message.
Step 5
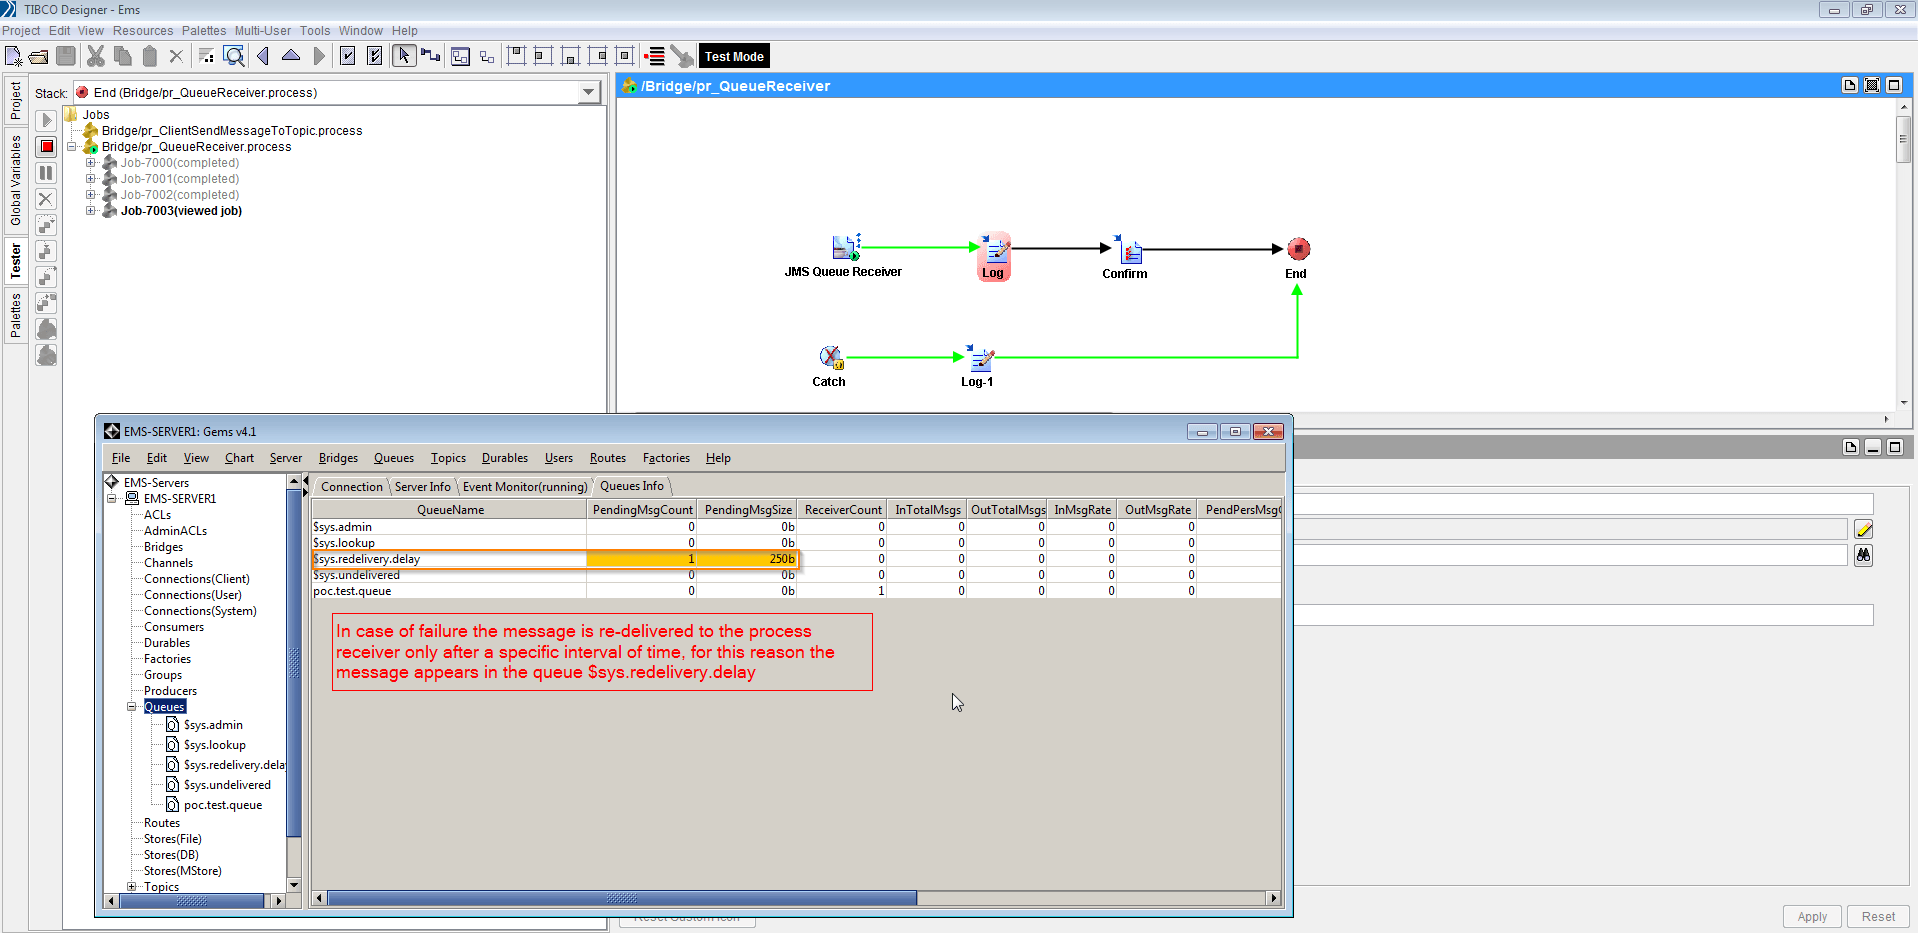
In this step a TIBCO BW receiver gets the message from the queue and due to a failure in the process, without acknowledgement of the message, the message will be moved to the queue $sys.redelivery.delay and re-delivered to the process receiver after a certain amount of time (i.e. specified in the queue configuration script).
Step 6
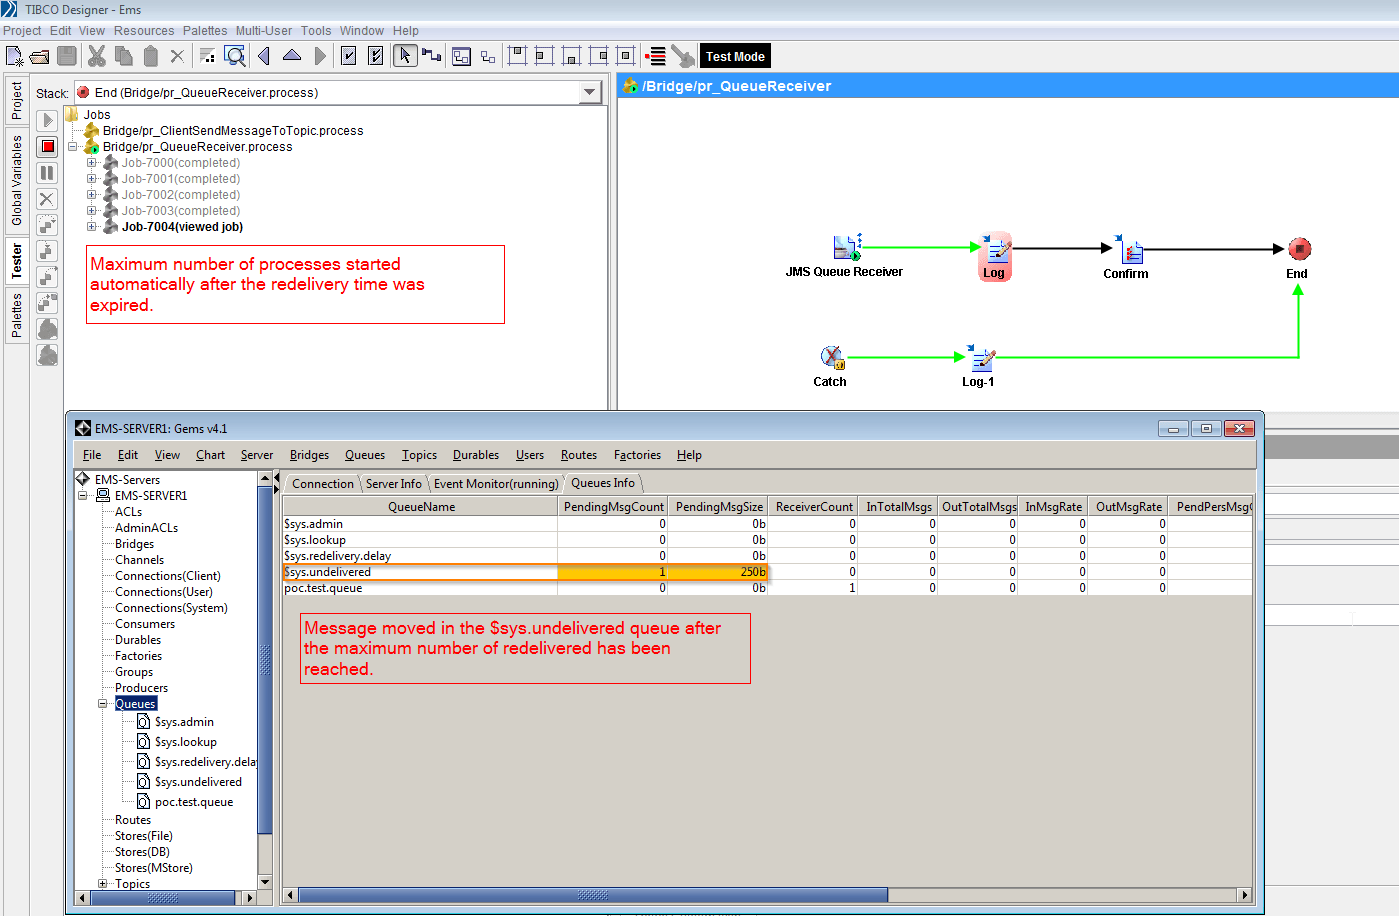
If the process receiver still fails after the maximum number of retries (i.e. specified in the queue creation script) then the message is moved in the queue $sys.undelivered.
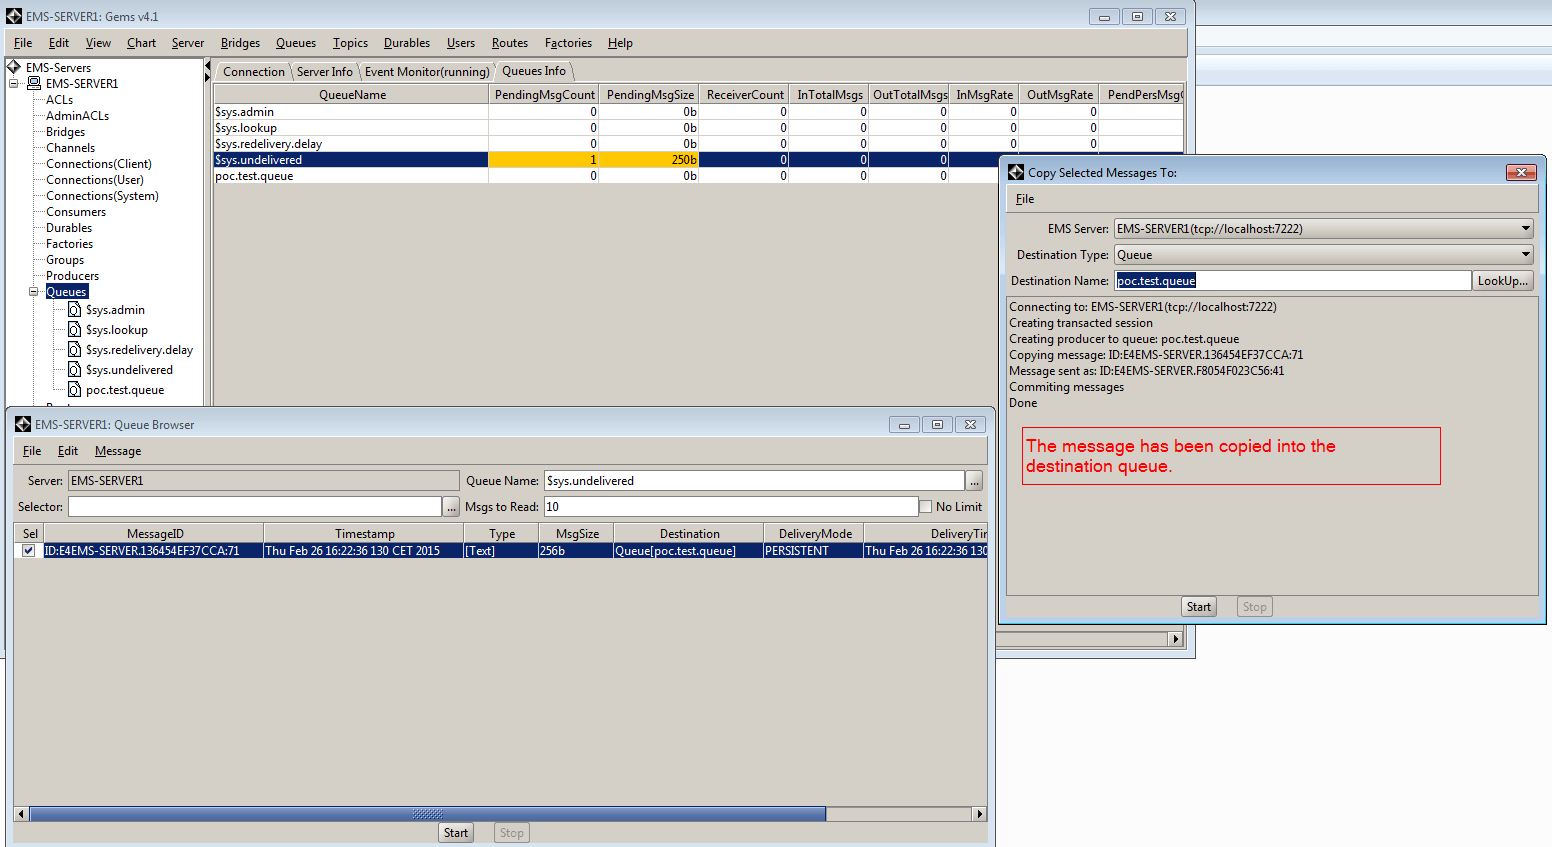
Step 7
The undelivered message is kept in the queue $sys.undelivered until someone decides to purge the queue or if the error in the process receiver is fixed the message can be published again using GEMS.
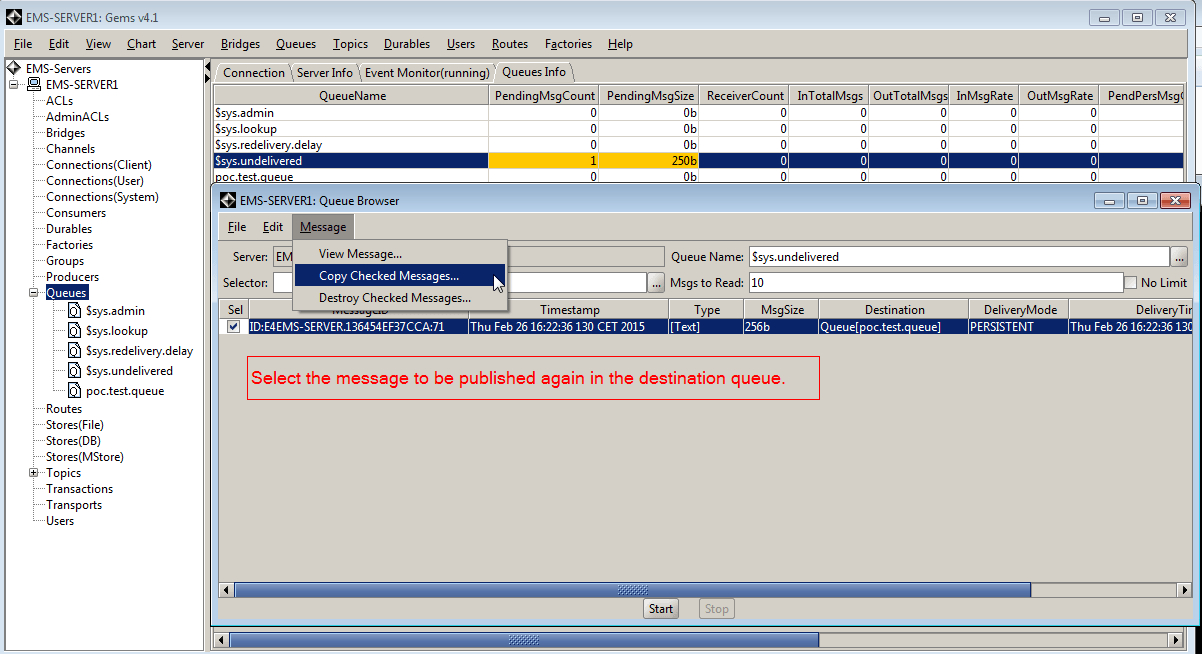
Step 8
The selected message will be copied to the destination queue.
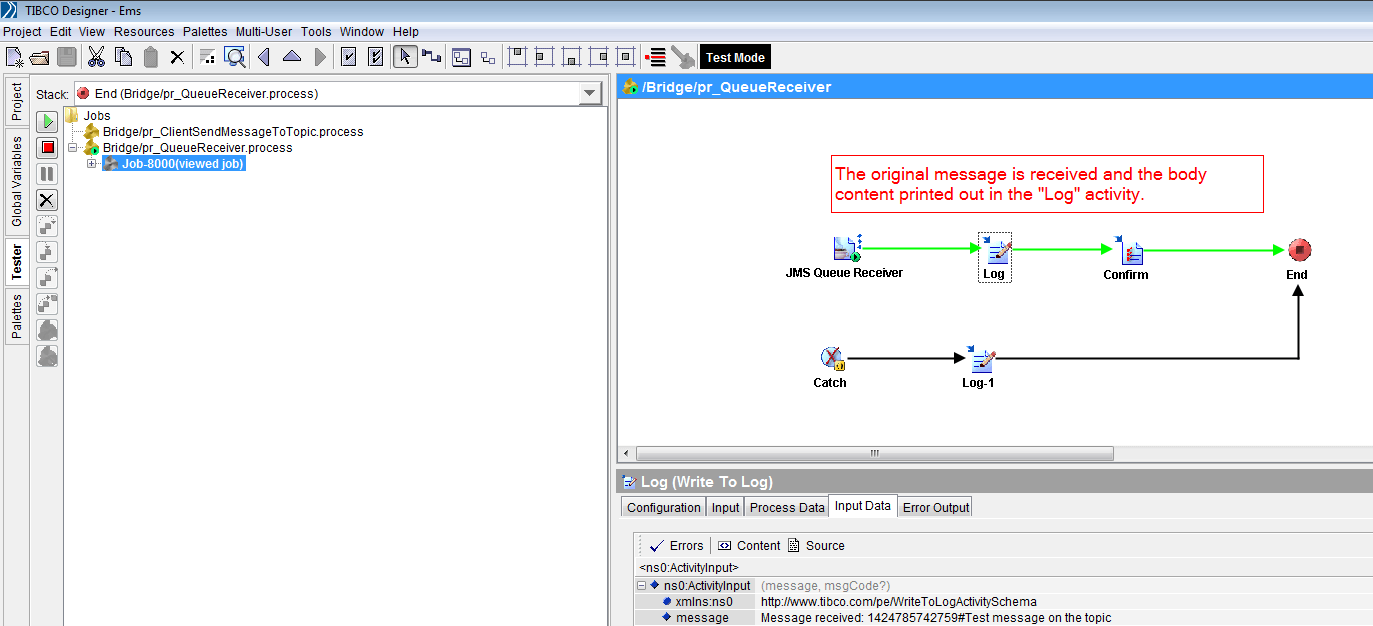
Step 9
Starting again the process receiver the message will be received and acknowledged properly. The message received is the same sent originally on the topic (see step 4).
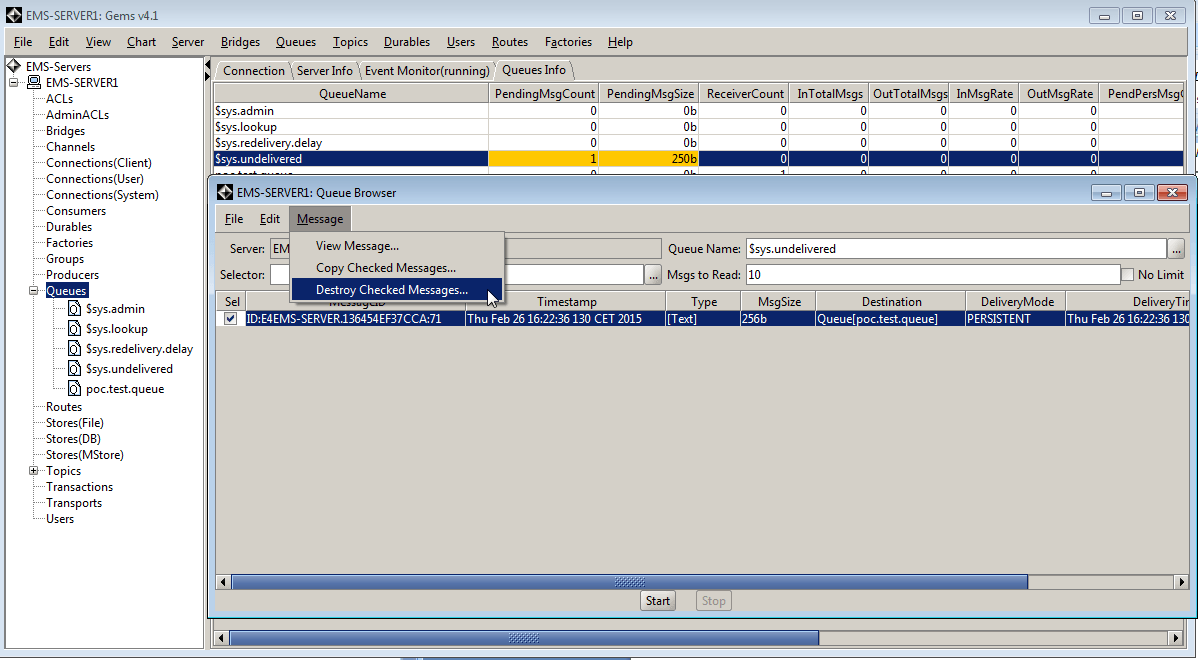
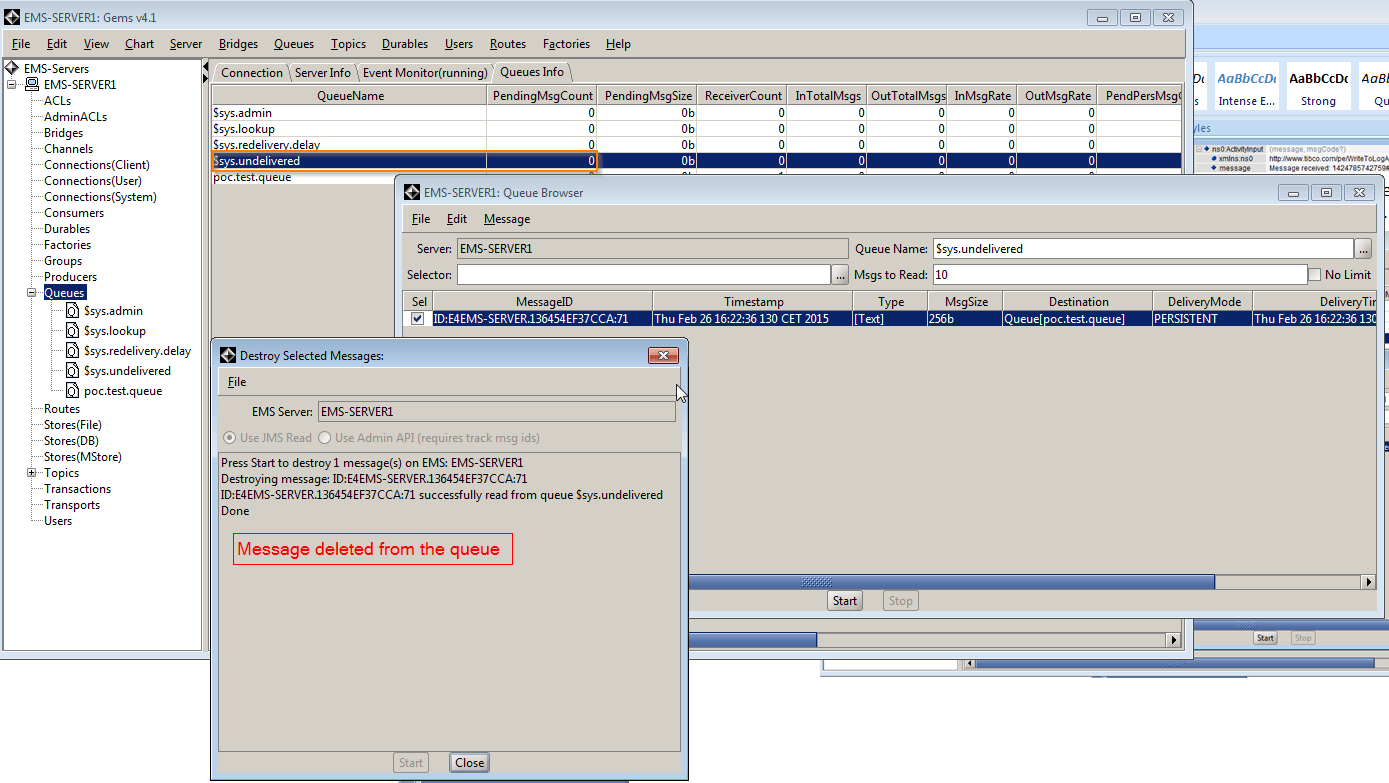
Step 10
Lastly, the message copy is still in the queue $sys.undelivered. Since the message has been received and acknowledged properly on the destination queue, the copy in the queue $sys.undelivered can be deleted.
Conclusion
The list of steps showed how to deal with a scenario where the TIBCO EMS server is used to bridge a topic to the queue and how to exploit the queue configuration capabilities and JMS properties, in order to have different functionalities out of the box. In the post there is also a description of some typical operations performed by the “Operation and Support team”, using the TIBCO GEMS tool.
Devoteam: the #1 partner when it comes to Tibco BusinessWorks
Due to our background in Integration and DevOps, we are the #1 partner for well-known Dutch organizations when it comes to Tibco BusinessWorks. Curious to learn more? Read all of our success stories, use cases, and technical blog-posts.

