Building Track bitcoin to USD exchange rate
This blog-post shows you how to create an exchange data visualizer by taking docker images from Docker hub and use Docker-compose to establish a connection between Python Flask web application and a database on top of an AWS ec2-instance.
Installing the AWS Linux machine and connecting it with SSH
- Install ec2 Instance
- After the complete installation .pem private key will be generated
- Download that .pem
- Open puttygen and press load button and load the .pem file from downloads into putty generator
- Putty generator will convert .pem private key to .ppk key
- Save that loaded .ppk key file
- Open the Putty and give the ip address of the above installed Linux machine
- Give the ssh port number (22)
- In options go to the ssh under ssh you will find the auth (where it needs key)
- Browse that .ppk key file and press ok
- Now your Linux machine is connected with your ssh
- Login into your amazon Linux machine with default password ec2-user
Install Docker and Docker Compose
Update your newly launched ec2 instance
-
$sudo yum update
Install Docker
-
$sudo yum Install docker
Start the Docker service
-
$sudo systemctl start docker
Enable the Docker service
-
$Sudo systemctl enable docker
Installing docker compose
-
$sudo curl -L "https://github.com/docker/compose/releases/download/1.23.2/docker-compose
-$(uname -s)-$(uname -m)" -o /usr/local/bin/docker-compose
set the permissions
-
$sudo chmod +x /usr/local/bin/docker-compose
To verify the installation
-
$docker-compose –version
Pulling the Docker images from Docker hub
Now we are going to pull two images from Docker hub.
The first image is a python image which contains our entire python application:
-
$docker pull ramyakosaraju/python5:ansible
The Second image is the MySQL image which will store the data coming from the first image:
-
$Docker pull ramyakosaraju/mysql:ansible
We are using Docker Compose to establish the connection between these 2 images.
run the images using docker compose
Create docker-compose.yml and place the below code in the yaml file.
version: “2”
services:
  db:

image: ramyakosaraju/mysql:ansible

container_name: mysql1

ports:

- "3306:3306"

environment:

MYSQL_DATABASE: exchangerate

MYSQL_ROOT_PASSWORD: newpassword

MYSQL_ROOT_HOST: mysql1

MYSQL_USER: root

MYSQL_PASSWORD: newpassword
web:
    image: ramyakosaraju/python5:ansible

build: .

container_name: python_001

depends_on:

- db

links:

- db

- db:database

ports:

- "5000:5000"
Start those two containers by running the following command
$docker-compose up –d
See the exchange data visualizer in python flask
To insert the live data from the alpha vantage website and store it in your database hit the URL
Ec2-instancehttps http://ec2public_ip:5000/insert
To see the data URL ec2-instance http://ec2public_ip:5000/fetch
5000 is the flask default port
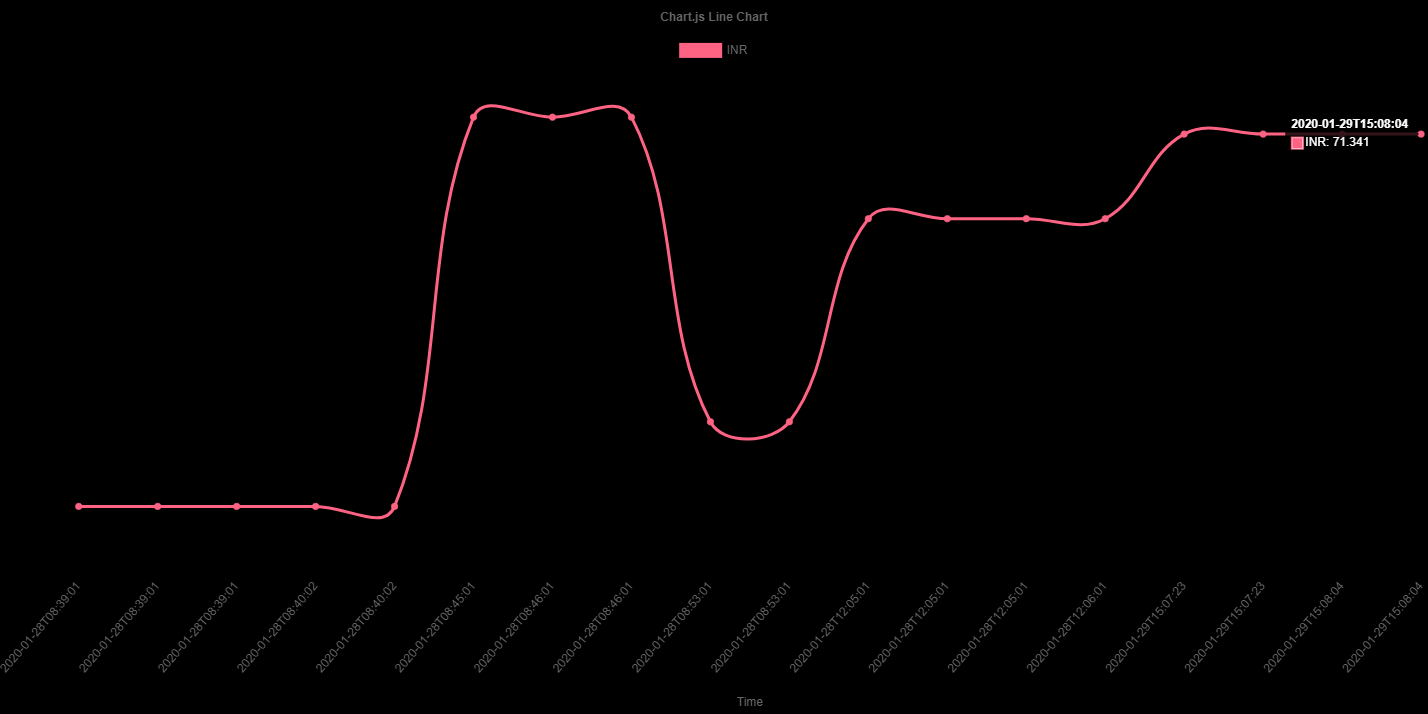
To visualize the inserted data in the form of an exchange data visualizer graph
http://ec2public_ip:5000/visualize
The output looks similar to this

Congrats! Your exchange data visualizer is now set up.
Do you have any questions about this blog-post? If so, contact me via my personal contact details in the author section below this blog-post.