

Kubernetes is a powerful container orchestration tool that has recently gained popularity. As organizations adopt Kubernetes, they need to consider how to best secure their resources. One option for authenticating Kubernetes workloads is to use OIDC.
OIDC (OpenID Connect) is an authentication protocol that builds on top of OAuth 2. It allows users to authenticate with an identity provider (such as Google or Microsoft). This post will discuss the benefits of authenticating Kubernetes workloads with OIDC, and how to set up and configure OIDC authentication.
Both Kubernetes and OIDC are complex. In the following paragraphs, I will talk a little bit about them. I recommend checking out the help links after finishing this post.
Why should I consider Workload Identity?
What are the benefits of authenticating Kubernetes Workloads with OIDC?
There are several benefits, including:
- Improved security – OIDC provides a higher level of security than traditional username/password authentication schemes.
- Reduced complexity – OIDC eliminates the need for passwords or certificate rotation
- OIDC is a standards-based protocol, which means it is compatible with a wide range of third-party identity providers.
- Azure OIDC is backed by Azure AD, which provides enterprise-grade security and reliability.
Unlike an Azure Function where you can easily bind an Identity, inside another external resource (Kubernetes cluster or in a Github Action), you need to define an identity manually.
What is Azure AD workload identity?
Azure Active Directory workload identity, is a feature that is in preview as I write these lines. This authentication method integrates with native Kubernetes features to federate with any external identity provider. This approach is simpler to use and deploy, and it overcomes several limitations in Azure AD pod-managed identity (another approach is to define an azure identity to workloads):
- Removes the scaling and performance issues that existed for identity assignment;
- Supports Kubernetes clusters hosted in any cloud or on-premises;
- Supports Linux and Windows workloads;
- Removes the need for Custom Resource Definitions and pods that intercept Azure Instance Metadata Service (IMDS) traffic.
Below you will see how federated identities work:

At the end of the day, you’ll only need to set Azure RBAC permissions to manage authorizations.
How to get started with Azure AD workload identity with AKS?
For me, the easiest approach to learning new things is to try implementing them. After everything is in place, I start to examine all the small components to go deeper. So let’s deploy a cluster.
In order to use Azure OIDC, you will need an Azure subscription. You can sign up for a free trial, or use your existing Azure subscription. You will also need to create an Azure Active Directory (AD) tenant. If you do not have an AD tenant, you can create one using the Azure portal.
Check out the code https://github.com/lucassc/aks-workload-identity and follow the steps on the readme file.
The terraform code will create:
- AKS Cluster with OIDC issuer enabled (aks.tf)
- Identity: App registration with service principal (app-identity.tf)
- A Kubernetes service account (app-identity.tf) for the identity
- Application Federation between App Registration and a Kubernetes service account (app-identity.tf) For more information see: Workload identity federation
- Install workload-identity-webhook helm chart – In the future will be a AKS’Addon (helm_charts.tf). For more information see: Mutating Admission Webhook
- Azure Key Vault to test the implementation (azure-key-vault.tf)
- Azure Key Vault Access policies: to allow the identity to perform secrets get and list operations. (azure-key-vault.tf)
After terraform apply (Step 1) you just need to create a new secret (Step 2) and deploy the example application to retrieve the secrets values (Step 4)Below you can see the request result using the Swagger IU, but the same result is possible with a curl command. You can find the curl command on the Github readme page at Step 5.
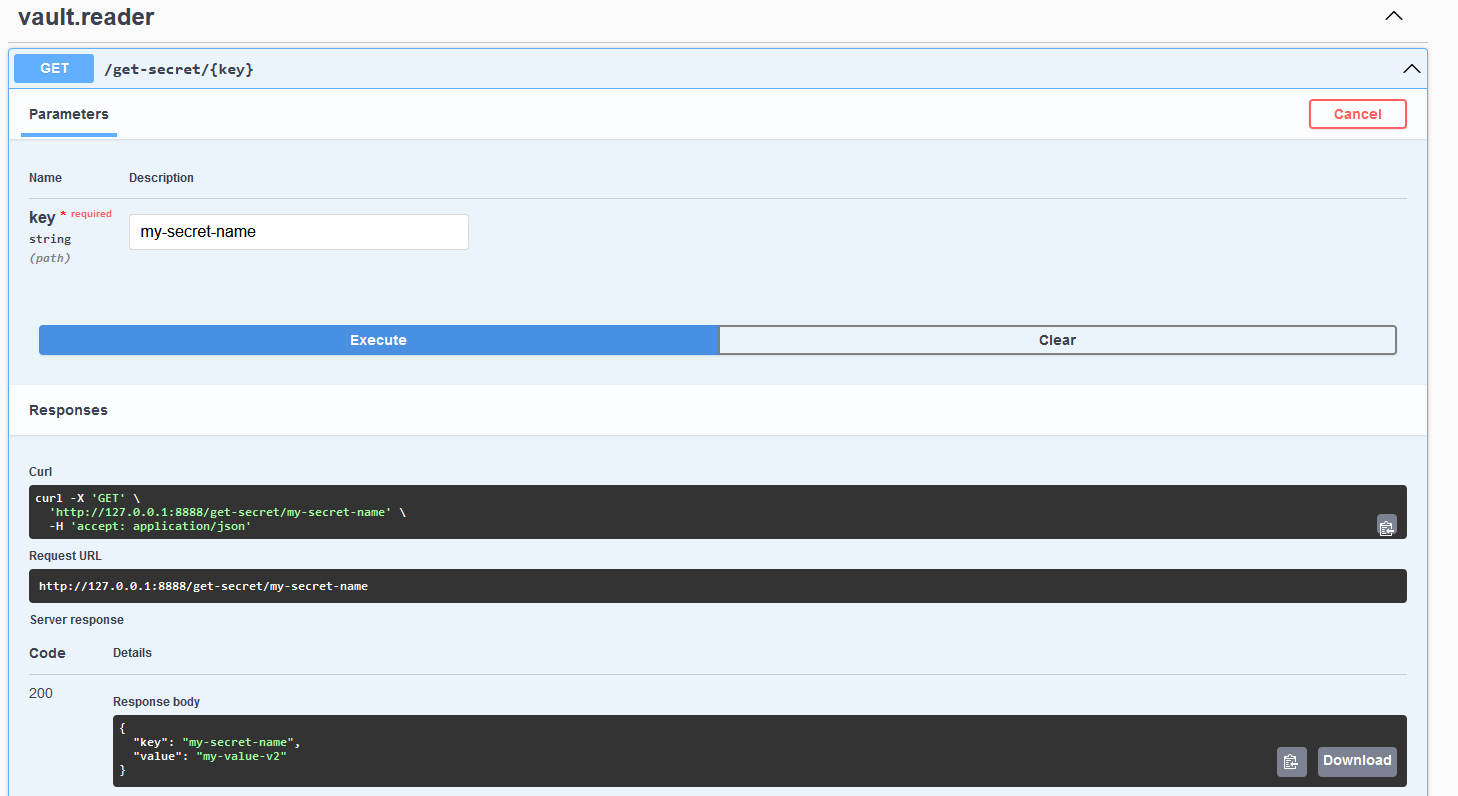
Now you can see, with everything in place, we touch a secret to allow the vault-reader to retrieve the secrets from the Azure Key Vault. The same approach can be used to authenticate against other resources like Storage Accounts and Databases. For this example, I used an AKS cluster, but the same approach will work for any Kubernetes cluster above 1.20+. Workload identity can work with k8s clusters at version 1.18+, but the recommendation is 1.20+.
Going deeper
- Azure Github pages: Introduction – Azure AD Workload Identity
- MS Docs: OpenID Connect (OIDC) on the Microsoft identity platform
- MS Docs: Use an Azure AD workload identities (preview) on Azure Kubernetes Service (AKS)
- Stop using secrets on Github actions: GitHub Actions with Azure AD Workload Identity Federation.
If you followed the steps in this post, you should now have configured an Azure Kubernetes cluster with workload identity. This will allow your cluster to use OIDC-based authentication against azure resources. Workload identity allows you to “map” Azure Active Directory (AD) identities to Kubernetes service accounts. This mapping enables Kubernetes workloads to use Azure AD Identity to access Azure resources.
If you’re looking to secure your applications running on Kubernetes, consider using a tool like kube-bench to check for common security issues. You can also read more about securing Kubernetes clusters in general in the Kubernetes documentation.
Let me know what you think about that, I’d like to hear from you.

